Link a Filter to your Sidebar for Fast Access

Prerna
Last Update hace 2 años
What is this article about?
- Learn how to access a filtered list view directly from the Sidebar, to increase efficiency
Who is this article for?
- All users accessing the Logward Platform, who want to customize their Sidebar
Introduction
The left-hand sidebar on the Logward Platform allows you to directly access the tables, reports, functions and features that your account admin made available to you.
Account admins can configure and assign role-specific sidebars, and users can easily customize their sidebar further.
For more insights, refer to the following guides:
- 'Create and assign role-specific sidebars' for account admins
- 'Customize your personal Sidebar' for all users of the Platform
Below guide will walk you through the process of adding an already configured and saved Filter View as a direct navigation link to your sidebar.
How to create these filtered views is explained here: 'Configure Filter View Templates' for account admins.
Note: While Filters define the visible rows, List Views control the columns relevant to a specific task. For maximum efficiency, you can combine both functions by adding a list view to a filter template. Corresponding filter templates of course can be linked to the Sidebar following the same steps!
Step-by-Step Guide
1. Access your sidebar Settings
Log into your account at https://app.logward.com/.
By default, the left-hand sidebar is collapsed. Mouse over it to expand the menu.
At the bottom of the sidebar, click on "Sidebar Settings" to open your personal Sidebar Configuration.

2. Add a new Element to your Sidebar
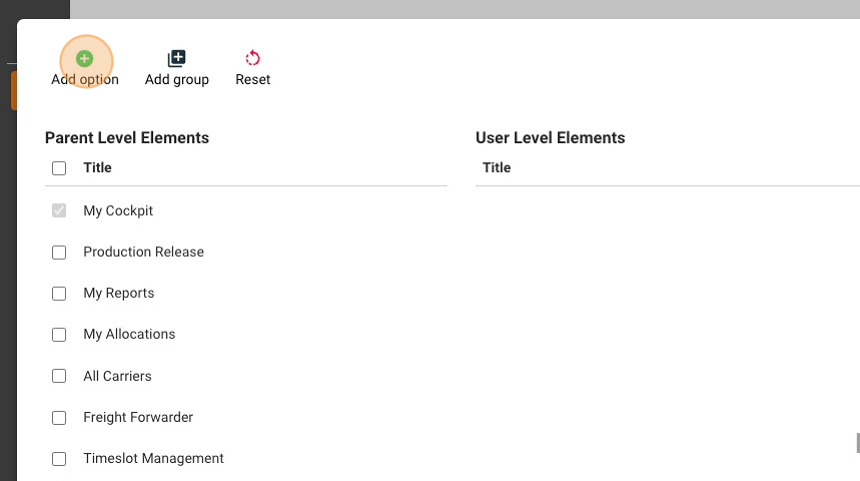
Within the Sidebar Configuration window, you see which elements are currently linked to your Sidebar:
- Parent Level Elements represent tables and functions that your account admin assigned to your role. Via checkmarks you can manage which of these elements appear on your sidebar.
- User Level Elements reflect tables and functions that you have added to your sidebar yourself. They are only visible on your own sidebar and can be edited by you.
To add a new user level element to your sidebar, click on the 'Add Option' button at the top:
To add a direct link to one of your preconfigured Filter Views to your Sidebar, select the category 'Tables':

Now select the Table to which your preconfigured Filter Template belongs. To do so, you can either type to search or scroll through the list to the required table:

3. Select the Filter Template
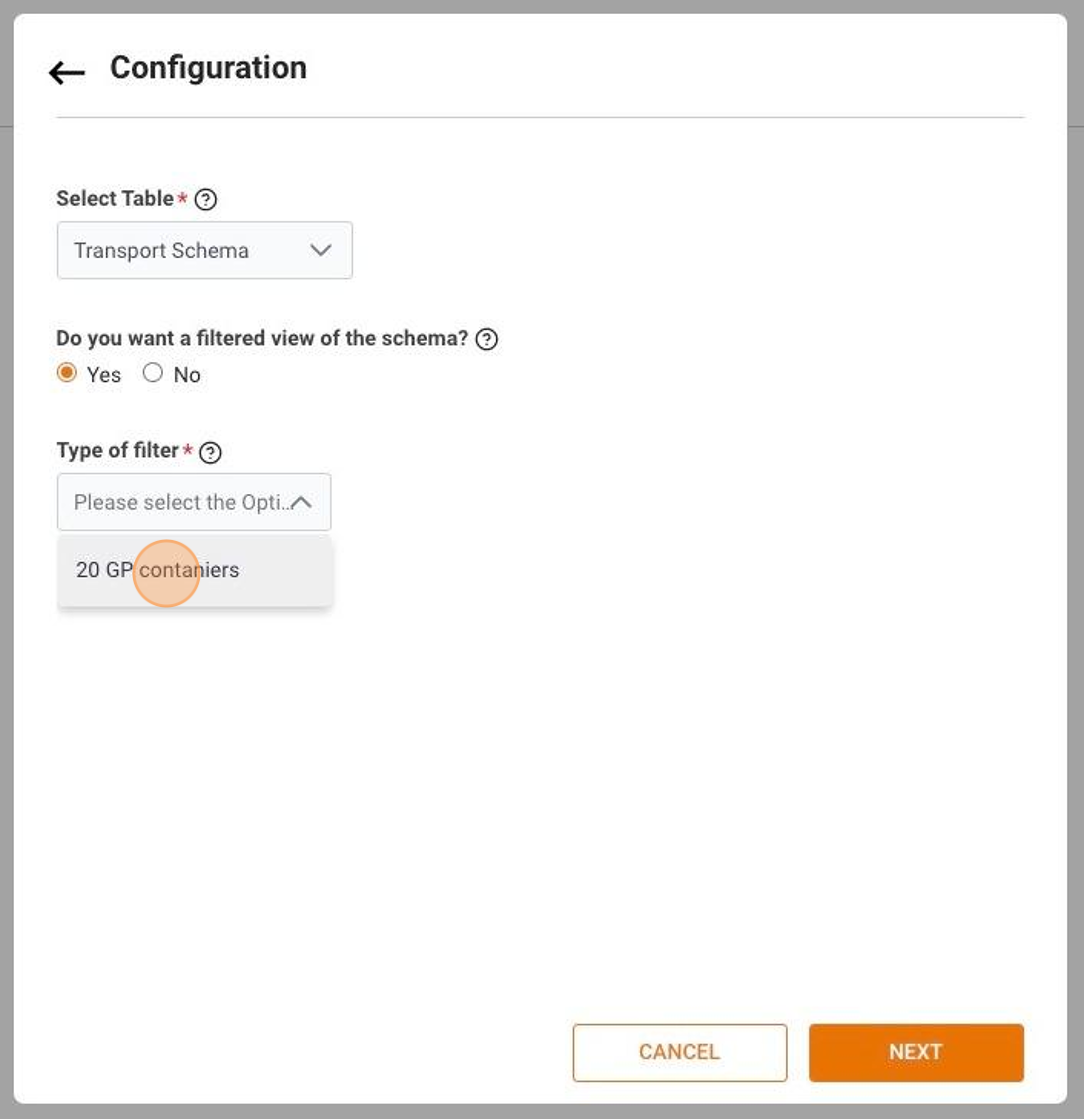
Once you selected a table, you are given the option to choose one of your filtered views. Click 'Yes':

A new dropdown list with your filtered views of the table appears. Select one, then proceed by clicking 'Next' at the bottom of the window.
In below example, the list view '20 GP Containers', which limits the table 'Transport Schema' to shipments with this equipment type, is chosen:
4. Add Aesthetics to your new Sidebar Element
You can now finalize your configuration:
- Assign a name to the new Sidebar Element. This name will be visible when the sidebar is expanded.
- Choose a suitable icon from 'Select Icon', to visualize the new element, while the sidebar is collapsed.
Then click the 'Add' button at the bottom right:

5. Save your Changes
You are now redirected to the start page of the Sidebar Configuration. The new element that directly links to your filtered view is added to the User Level Elements, where it can be edited by you at any time:

Finalize your changes by clicking 'Save' on the top right and your sidebar will immediately reflect your adaptions!
This guide is part of a series. For more insights, such as combining a Filter Template with a List View Template, have a look into the related articles below.