Configure List View Templates for a Table

Prerna
Last Update hace un año
What is this article about?
- Learn how to enhance your team's efficiency by creating and sharing list view templates
Who is this article for?
- Account admins and users with the AddOn Permission to create list view templates
Introduction
Data tables in your Logward account, such as those containing Purchase Orders, Containers, or Warehouses, hold vast amounts of data.
Depending on a user's role and workflows, these default tables can present more information than needed to perform a task efficiently.
To address this, you can create and share pre-filtered and sorted list view templates with your teams. The following configuration options are available to you:
- Select Columns
- Rearrange Column Order
- Sort Objects by Any Column
- Group Objects
- Filter Objects
Before diving into the step-by-step guide, here are some basic facts about List Views:
- All users can rearrange and sort tables that they have access to, and save these custom list views for recurring usage, without altering the table appearance for other users.
- Account admins and users with corresponding permission additionally can set up and share list views with other roles.
- A list view always relates to a specific table, and you can have as many list views for the table as you need.
- List Views can be added to the Sidebar for efficient accessibility.
Step-by-Step Guide
1. Navigate to List View Templates
Open the table for which you want to set up a List View Template, select 'Configurations' from the toolbar:
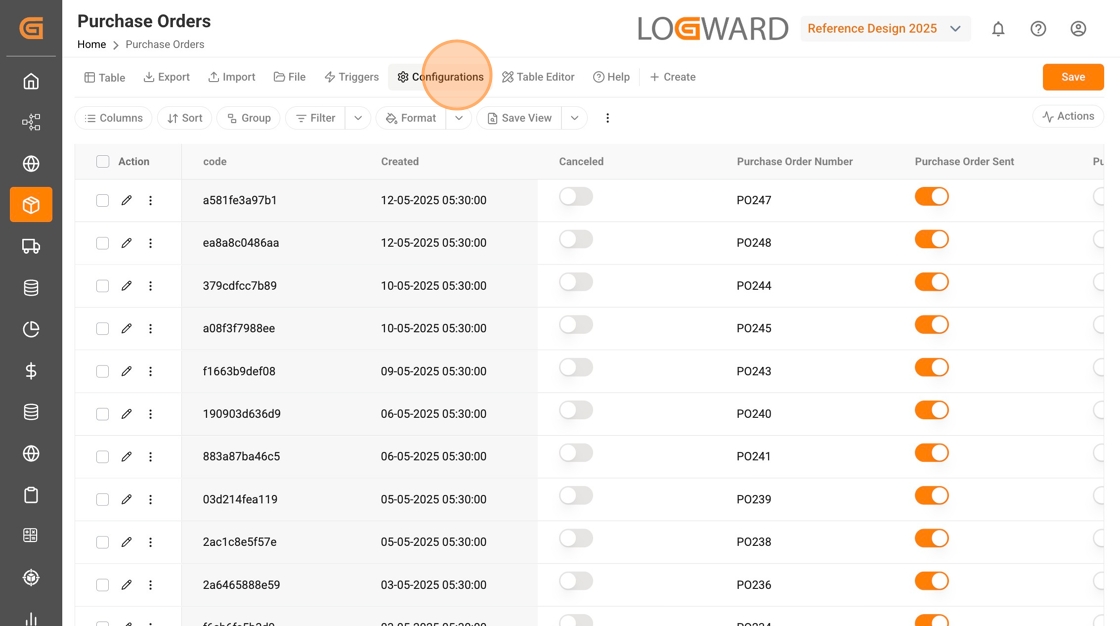
This opens the list of all table-level configurations that are available to you, based on your role permissions.
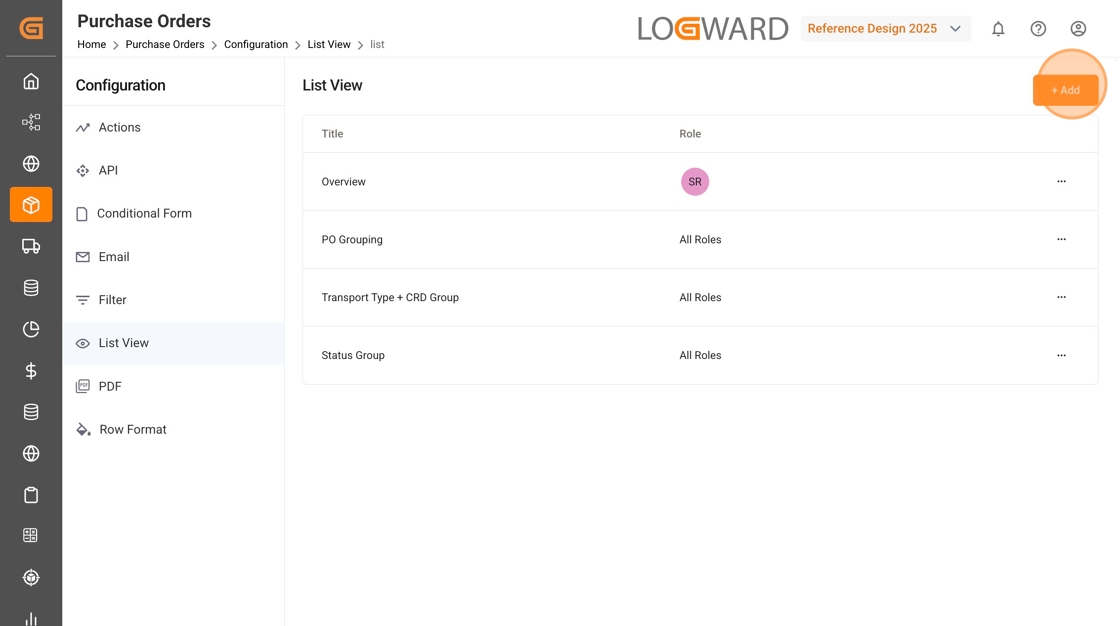
Via the Configurations sidebar, access 'List View'. All existing list view templates will be listed and can be edited by you from here.
To create a new template, click on the 'Add' button on the top right corner of the page:
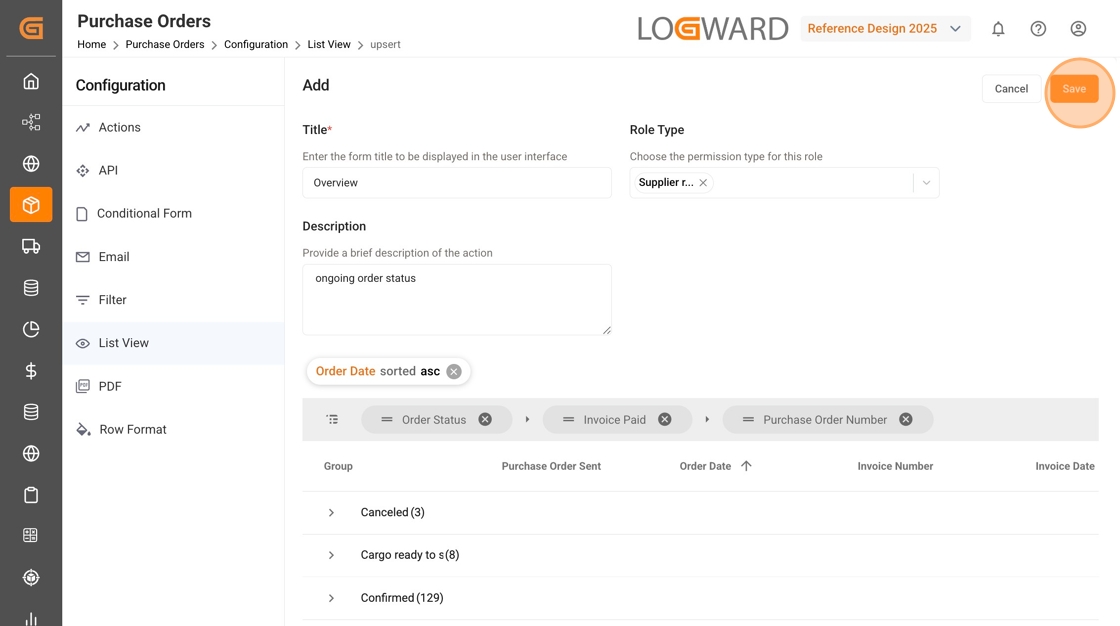
2. Create a New Template
After clicking 'Add', enter a name and short description for the template. Then select all roles that shall be able to see this list view:
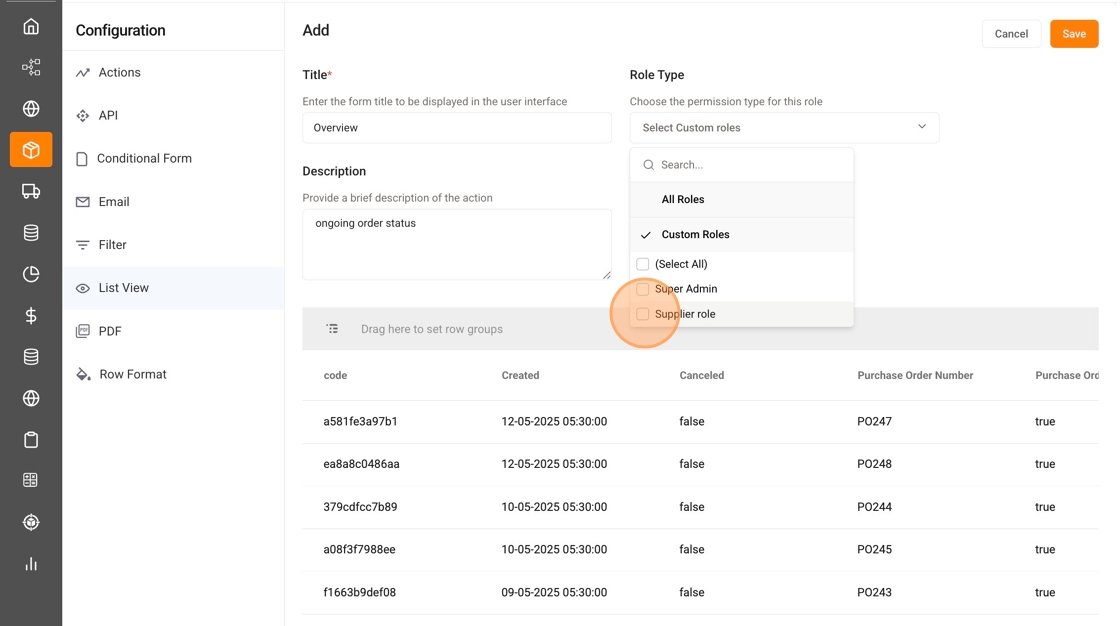
Once you've added the basic details, you can configure your list view template. Several configuration options are available and will be explained in the following.
Note: It is not mandatory to apply them in a specific sequence or to use all of them.
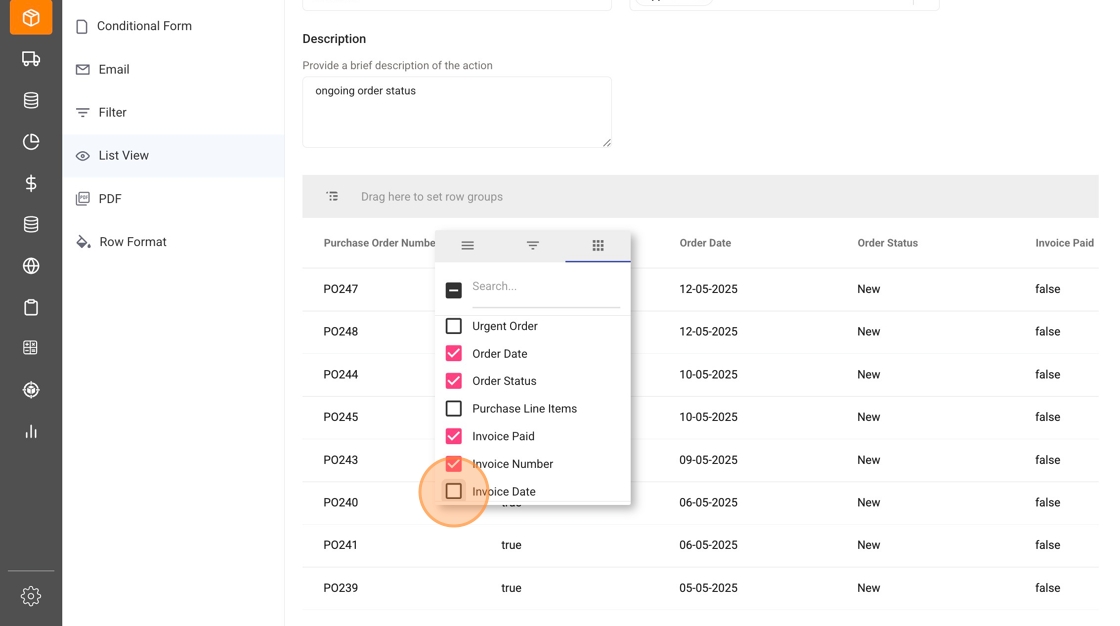
3: Select Columns for your Template
To reduce the number of columns in your custom list view, hover over any column header of the table. Click the appearing 'menu' icon to expand the configuration window:
Within the configuration window, select the third tab. This will provide you with a list view of all columns:
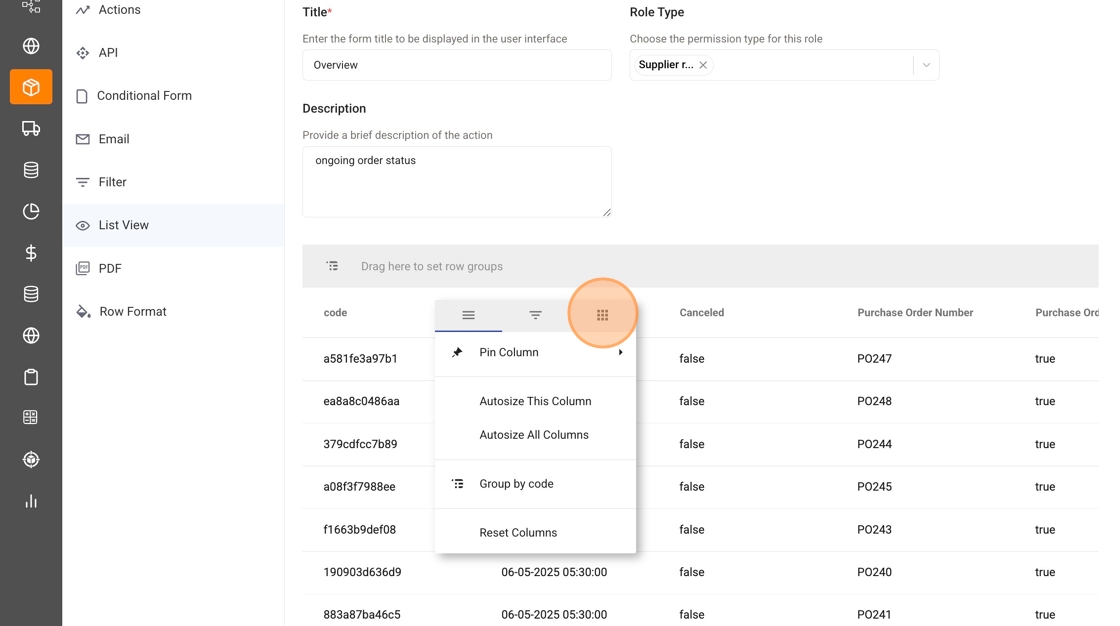
You can now define which columns are required for your task at hand. As and when you click the checkboxes, you will immediately see the effect in the list view behind the configuration window:
4. Rearrange Column Order
Tables support horizontal scrolling through all columns, and columns can be quickly re-sorted via drag and drop.
To change the position of a column, hover over the column header, then click and hold its 'menu' icon. You can now drag the column to its desired position and drop it:

5. Sort Objects by Any Column
By default, objects in a table are sorted by their most recent update time. When you click on a column header, the objects will be reordered based on the values in that column. The first click sorts in ascending order, the second click sorts in descending order, and the third click resets the table to its default sorting:

Note: Sorting can only be applied to one column at a time. If a custom sort is active, it will be indicated by a pill at the top of the table. You can remove this sort by clicking the 'x' button in the pill.
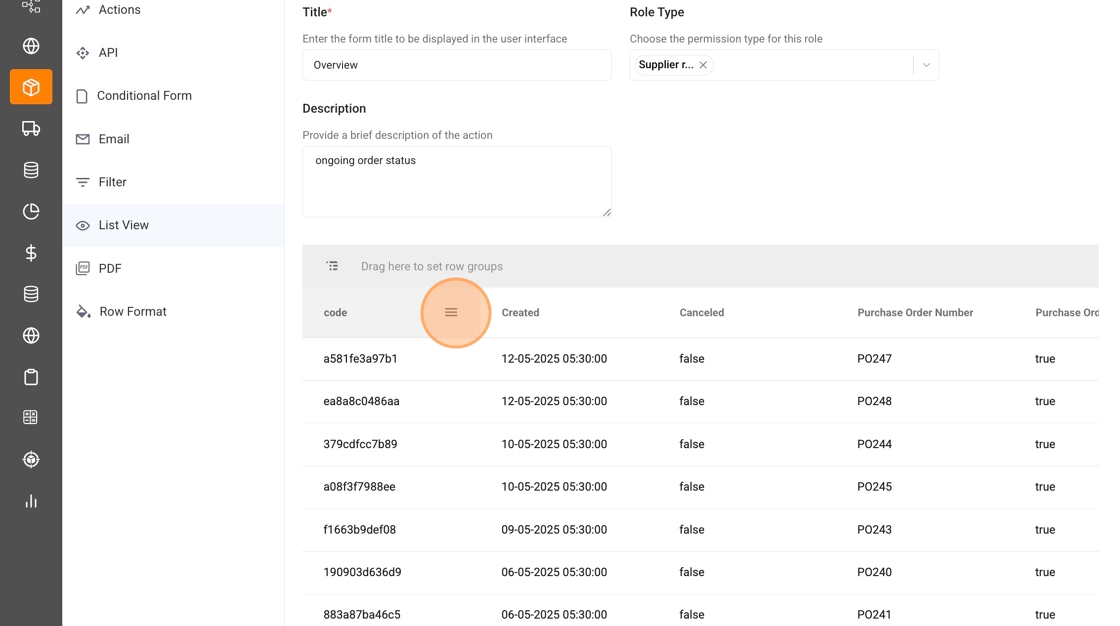
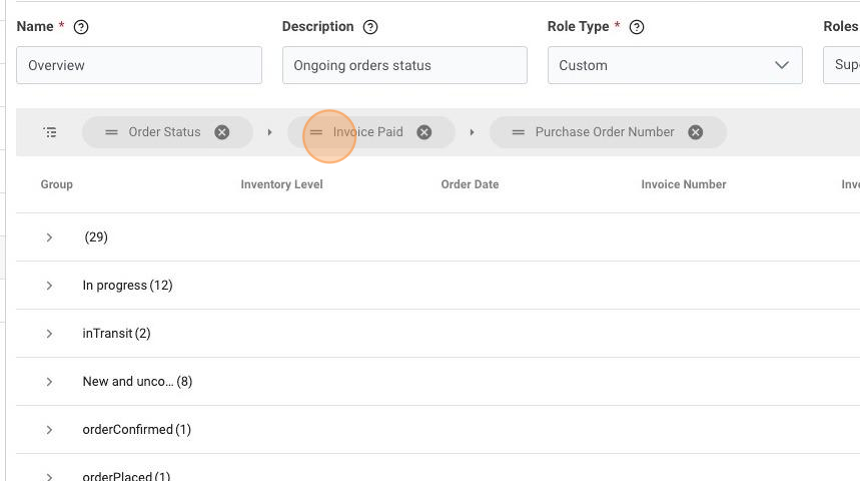
6. Group Objects
Along with sorting the data rows, you can also group them based on one or more column parameters.
Click and hold the column header of the parameter, by which you want to group the table objects. Now drag and drop it into the grey bar on top of the table that says 'Drag here to set row groups':


You can set up multiple levels of groups. If you drag another column header into the grey bar on top of the table, the objects within the existing groups will be sorted and grouped by the additional value:

To change the sequence of grouping parameters, simply drag the pills within the grey bar by clicking the icon indicated below. To remove a grouping parameter click the 'x' icon:
7. Filter Objects
To add a filter, hover over the column header that holds the required filter value. Click the appearing 'menu' icon to expand the configuration window, and select the second tab.
Start by choosing an operator in the first field.
Depending on the data type of the selected column, such as a date or a number, the list of operators will differ.
Then select or type the filter value in the second field and click 'Apply':
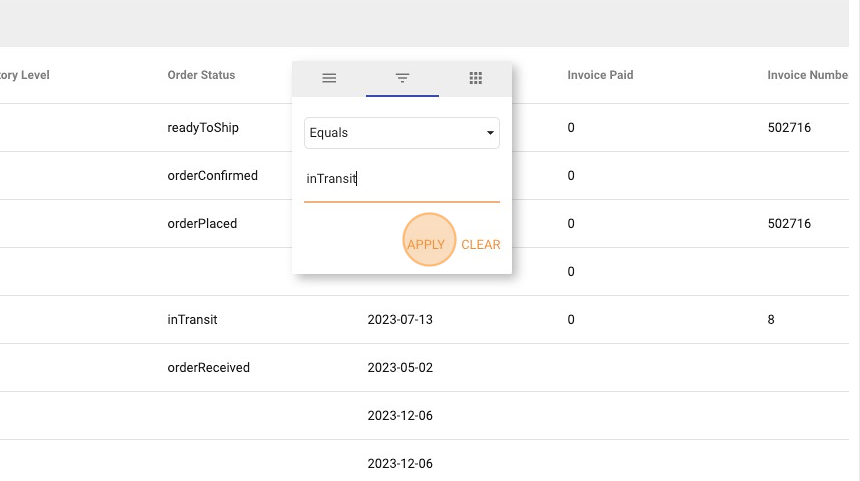
Note: You can apply a filter on as many columns as you need. The filters will be applied in the order you have created them.
8. Save your List View Template
Once you've tailored the template to your needs, click on the 'Save' button on the top right as shown below:
Your List View Template will now be available for users of the selected roles within the menu 'View' of the corresponding table. For a detailed guide, please refer to the article 'Access a Saved List View of a Table'.
If you have additional questions, please do not hesitate to reach out to us at: [email protected]