Link List View To a Filter Template in a Table

Prerna
Last Update 2 years ago
What is this article about?
- Learn how to increase efficiency by combining a filter with a pre-configured List View of the selected table
Who is this article for?
- Account admins and users who have the AddOn Permission to create Filters and List View templates for tables
Introduction
Filters help you display only those objects in your table that meet specific criteria, allowing you to focus on relevant data within large datasets.
For example, you might filter transport orders to only show specific material types on a selected trade lane.
While Filters define the visible rows, List Views control the columns relevant to a specific task. Combining both ensures maximum efficiency by highlighting only the most important data with one click.
Now, let’s walk through the steps to optimize your table!
Step-by-Step Guide
1. Navigate to a List View Template
Before combining a Filter with a List View, a List View Template has to be available for the relevant table.
To look up the existing templates, navigate to the relevant table, access the menu 'Edit' and select 'Configuration' from the toolbar:

Via the Configurations sidebar, access 'List View' to inspect the existing templates for the selected table.
If none is created yet, please refer to 'Configure a List View Template' for guidance.

2. Create a New Filter
In the Configurations sidebar, you can now navigate to 'Filter' to inspect the existing filter templates.
To add a list view to an existing filter template, use the 'pencil' icon on the right-hand side to edit the filter.
Alternatively, click the 'Add' button on the top right to create a new filter template.

3. Select the List View
If you create a new filter, start by entering a title and selecting all roles that shall be able to use this filter.
From the 'List View' dropdown you can now select the template that you want to combine with your filter.
in this guide, we select the list view template called 'Overview':

4. Add Filter Condition
If you are creating a new filter template, you can now proceed with configuring the filter conditions, by adding and combining rules.
in the following, we will walk you through the creation of a simple condition that filters our Transport Order table for 20'GP containers.
Start by clicking 'Add Rule':
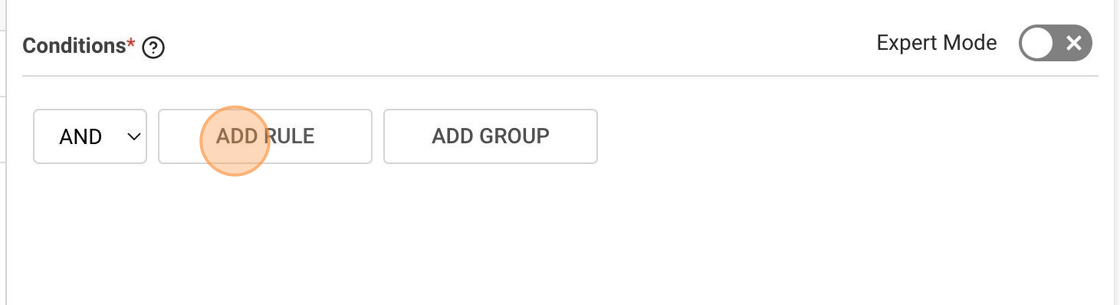
This will open a new row where you design your filter rule. It always consists of 3 fields:
- Field: Pick an adequate field for your filter operation from a dropdown list with all fields of the table
- Operator: Choose an operator from a dropdown list with all applicable operators for the data type of the selected field
- Value: Type or pick the input value based on the selected field's data type
For our simple filter, we pick the field 'Container Type', choose the operator 'equals' and select the value '20GP':

To learn how to create a more complex filter that combines different rules, please refer to the guide 'Configure a Filter Template'.
5. Save your Filter Template
You can now scroll up and click the 'Save' button on the top right side of the page:

That's it! You have successfully created a filter and combined it with a list view that your users can access with a single click.
This guide is part of a series. For more insights, such as accessing a Custom List View directly from your Sidebar, have a look into the related articles below.
If you have additional questions, please do not hesitate to reach out to us at: [email protected]