Add a new Ramp to your Warehouse

Prerna
Last Update a year ago
What is this article about?
Learn how to configure ramps for a warehouse in the Time Slot management System.
Who is this article for?
Any Warehouse Admin User with the AddOn Permission to configure Time Slot Management settings.
Introduction
Ramps serve as the designated loading and unloading points of your warehouse, ensuring a structured and optimized flow of inbound and outbound shipments.
- Optimize warehouse capacity by defining ramp availability.
- Reduce scheduling conflicts with dedicated slot management.
- Improve efficiency through configurable working hours and slot blockers.
- Adding and managing ramps.
- Setting up working hours and slot availability.
- Configuring frozen periods for maintenance or priority handling.
Step by Step Guide
Step 1: Navigation
After login, click on 'Time Slot Management' in your sidebar, then select the nested menu 'Ramp Calendar'.


Now click on the settings icon on top of the calendar view to open the warehouse configurations:
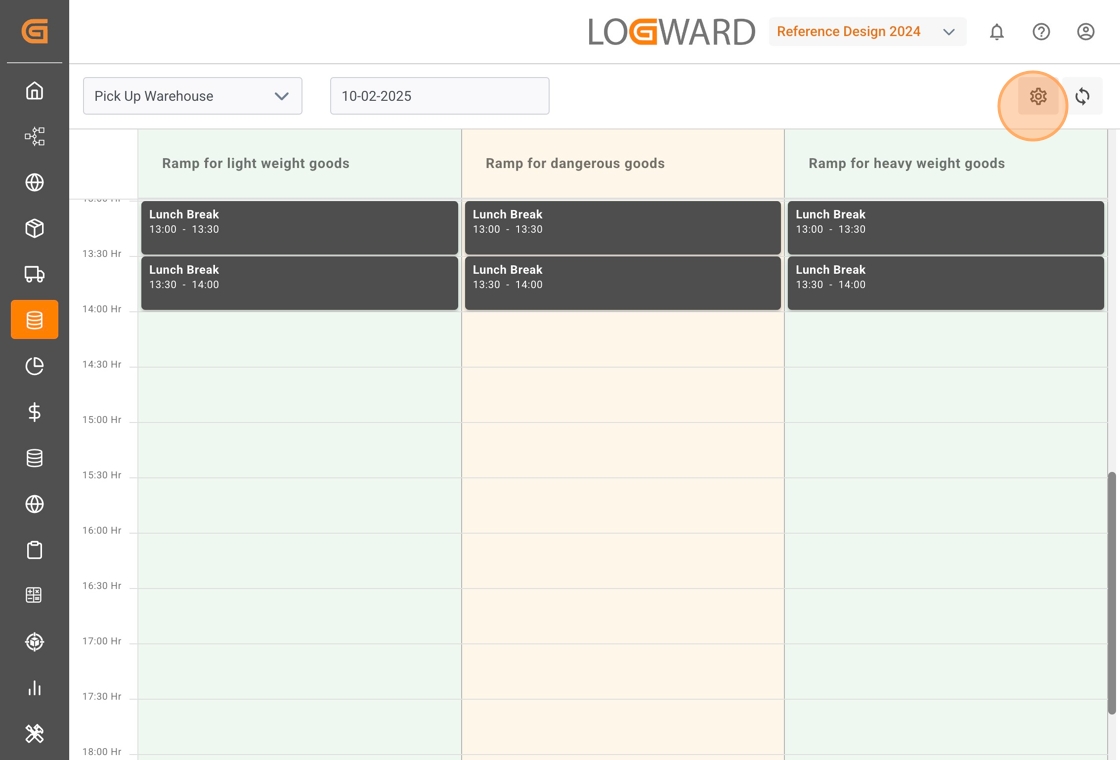
Select the tab 'Warehouse' and click the 'Edit' button of the warehouse for which you want to add or edit ramps.

Step 2: Create a new Ramp
Once you've accessed the warehouse settings, click the 'Add Ramp' button on the right. This will open the Ramp Configuration popup.

Begin by naming the ramp.This name will be visible to all users and partners who can access your Time Slot Management System.

Step 3: Configure Working Hours for the Ramp
Before defining opening hours for the selected ramp, choose the configuration 'Uniform', if your ramp is open every day, and at the same time each day. Choose 'Custom' if you wish to configure different working hours for individual days of the week.
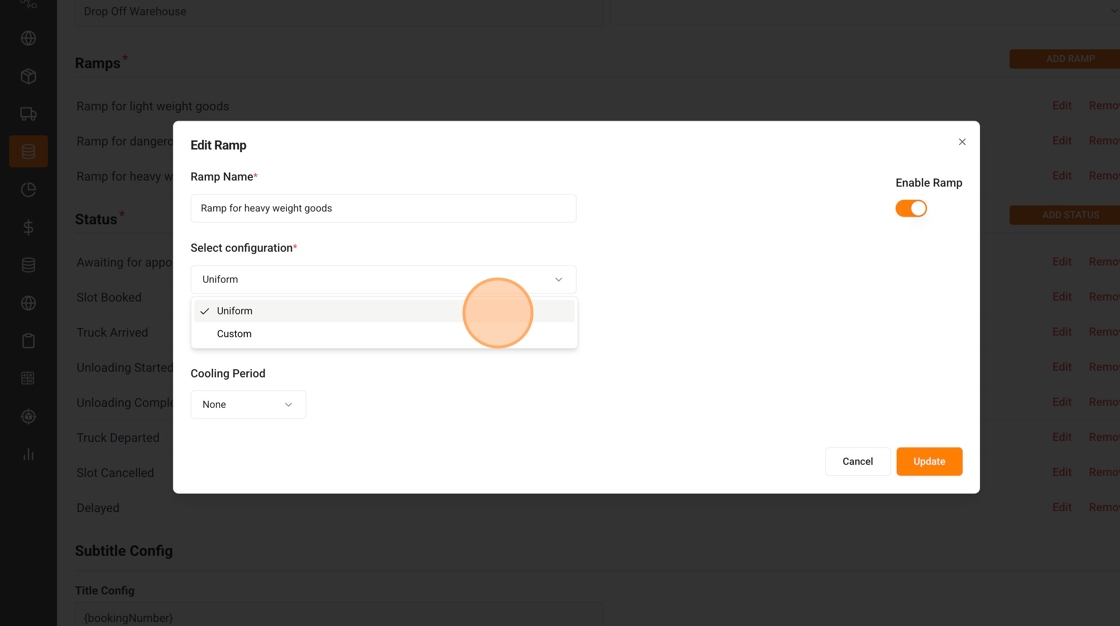
By default, the Uniform configuration is selected and you can proceed with setting the opening and closing time from the dropdown field.

If you select the configuration option 'Custom', your view changes. Use the toggle to enable a weekday, then set the opening and closing time for this day:

Step 4: Configure Frozen Periods (Optional Step)
To prevent last minute slot bookings, the Time Slot Management System offers Frozen Periods. This allows you to define a minimum advance booking time for each day and ramp. For a detailed walkthrough, please refer to the guide on how to Configure Frozen Periods.
Step 5: Configure Slot Blockers (Optional Step)
Step 6: Save your Settings
Once you have defined the opening hours and frozen period for your ramp, click 'Add' or 'Update' to close the Ramp Configuration popup.
You will now see the Warehouse settings again and your new ramp will be visible in the Ramp list. Using the buttons 'Edit' and 'Remove' on the right you can update or delete your ramp at any time.
Now scroll to the bottom of the page and click the 'Save' button on the right hand side.

That's it!
You've successfully configured a new ramp for your warehouse and can start booking pick-up and drop-off slots.