Configure a Holiday Calendar for Your Warehouse

Prerna
Last Update hace un año
What is this article about?
Learn how to set up a calendar with multiple custom-created holidays for your warehouse in Logward's Time Slot Management System.
Who is this article for?
Any Warehouse Admin User with the AddOn Permission to configure Time Slot Management settings.
Step by Step Guide
Before creating a calendar, keep in mind that this configuration applies at the Time Slot Management level. This means the same holiday calendar can be shared across multiple warehouses.
However, you can also create separate calendars, which is useful if your warehouses are located in different countries. The appropriate holiday calendar is then assigned to each warehouse in the warehouse settings.
Let's get started!
Step 1: Navigation
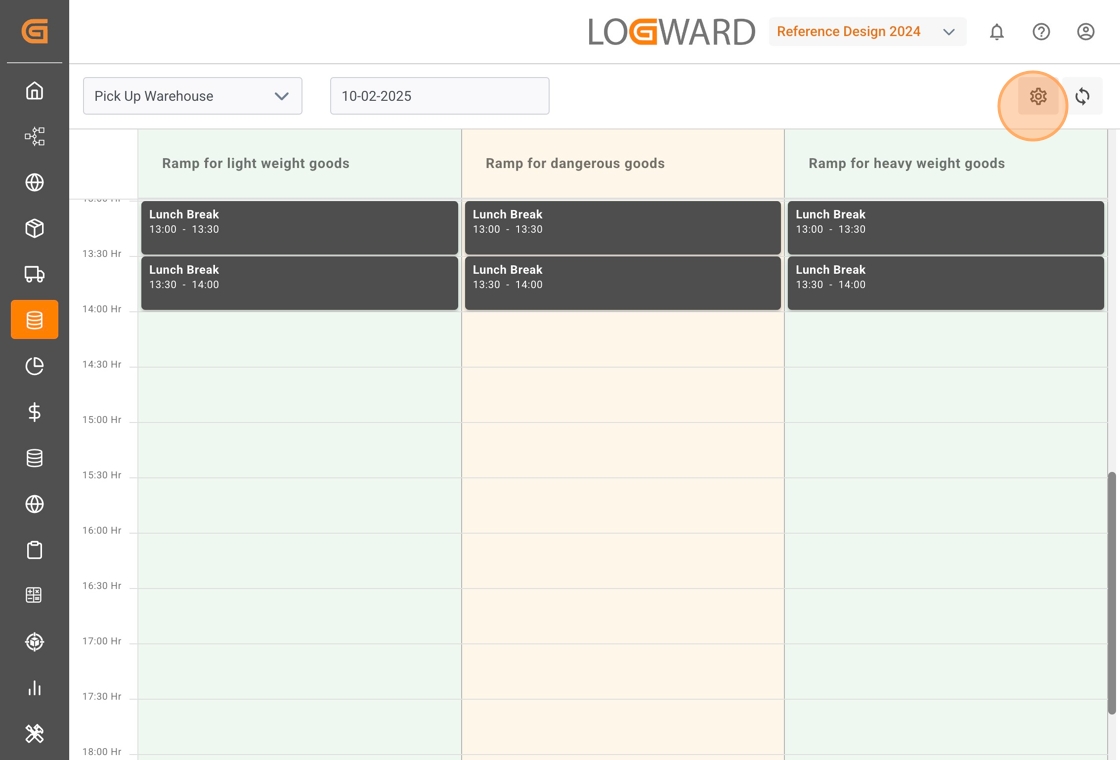
After login, click on 'Time Slot Management' in your sidebar, then select the nested menu 'Ramp Calendar'.


This will direct you to the calendar view where your warehouse staff and partners can book time slots for the ramps and warehouses defined by you.
Click on the settings icon on the top right of the calendar view to open the warehouse configurations:
Step 2: Create New Holiday Calendar
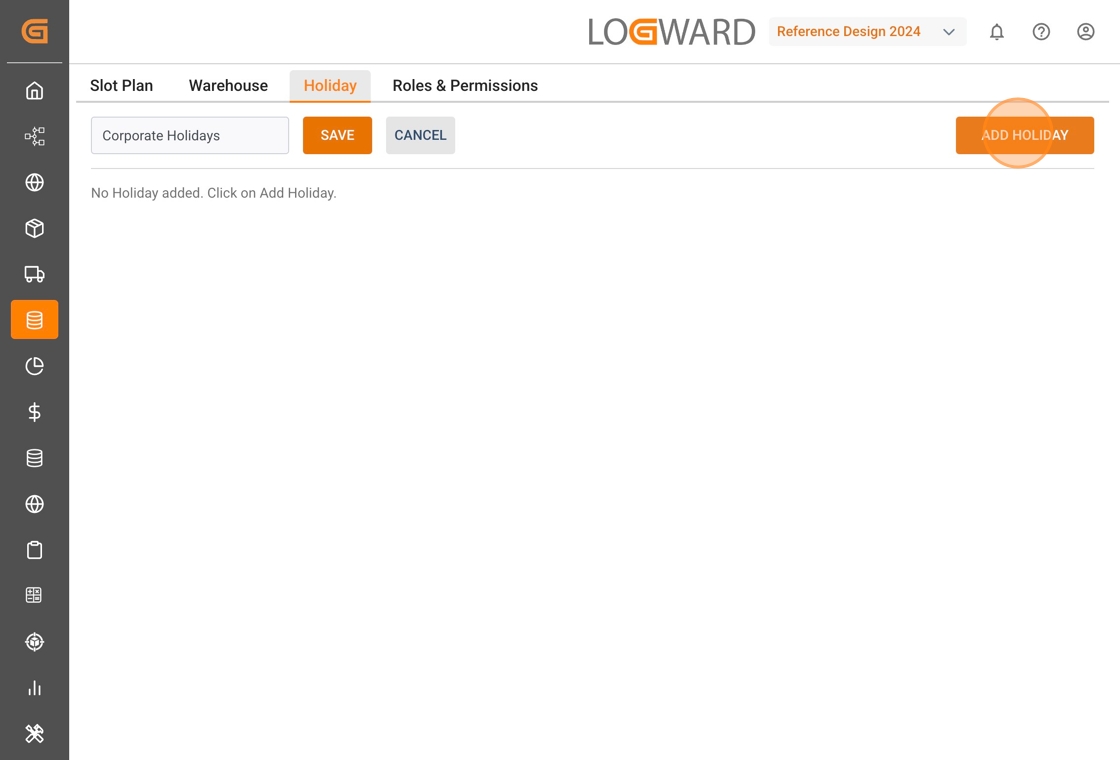
Within the configurations view, you find four tabs for specific settings. Select the third tab 'Holiday' and click on 'Add Holiday Calendar' in the top right corner:

You are directed to a new page where you can add multiple holidays and create a calendar. To begin, give your calendar a name:

Step 3: Add a Holiday to the Calendar
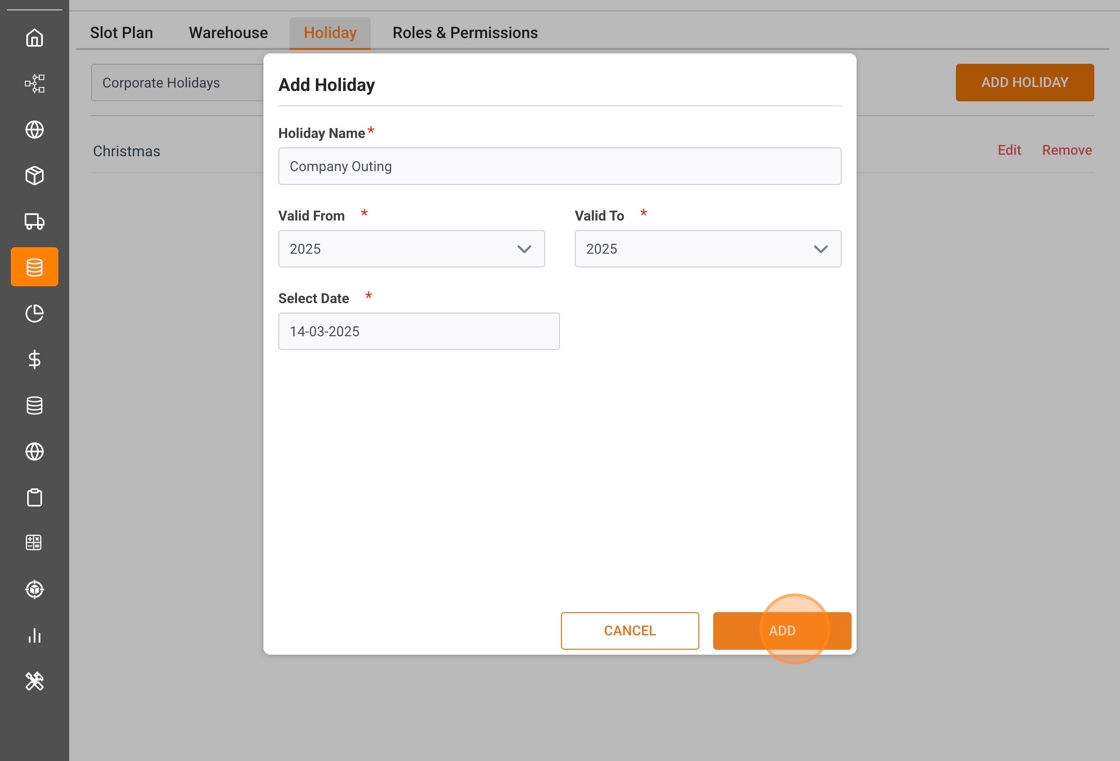
Proceed with clicking on the 'Add Holiday' button on the right side. This opens a popup window that facilitates quick and easy addition of holidays to the list:
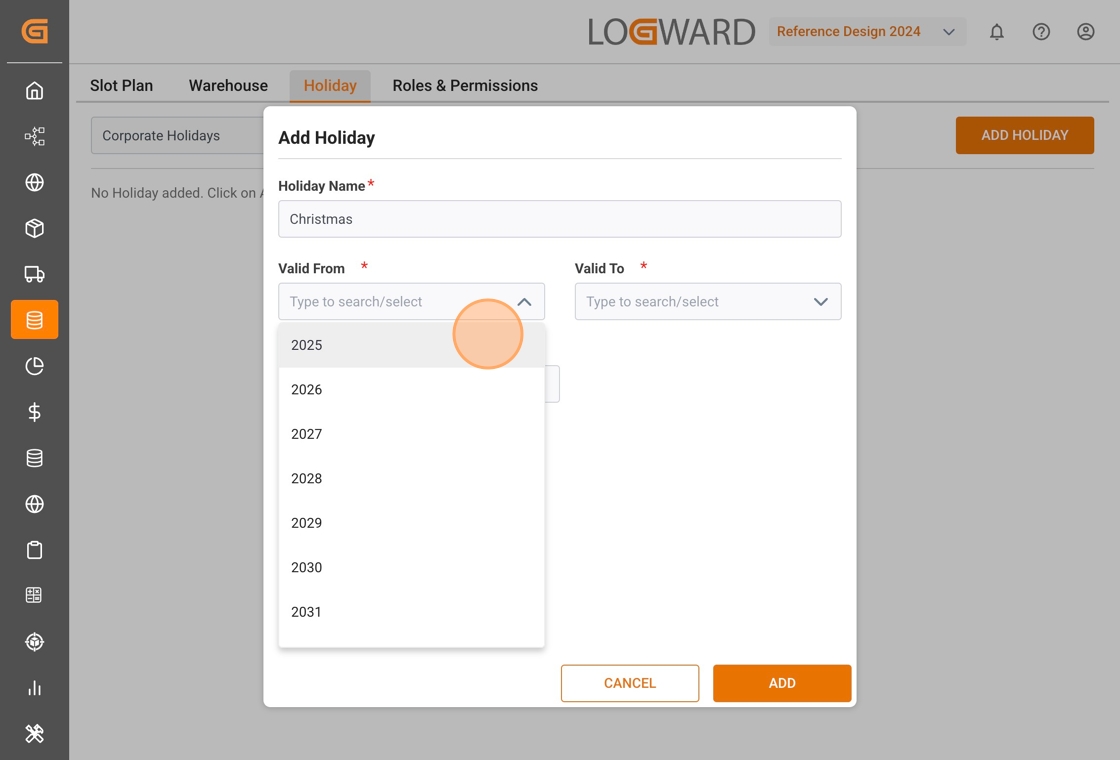
Enter a name for the holiday (e.g., 'Christmas'), which will be visible to all users, and specify the validity period by selecting the start and end years from the respective dropdown fields:
Now select the specific date for the holiday, using the date picker:
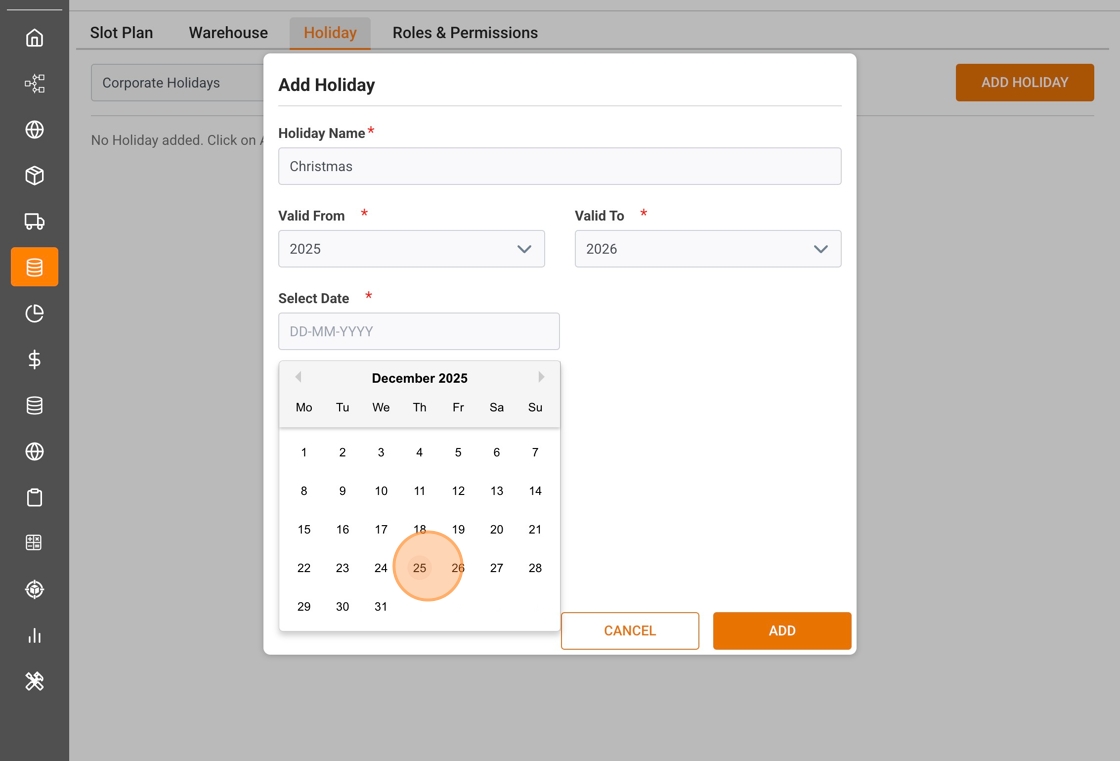
Once done, click on the 'Add' button at the bottom of the popup. The newly configured holiday will then be added to the list.

Using the same steps, you can add as many holidays as you need.
Step 4: Save your Holiday Calendar
Once you have added all holidays to your calendar, click the 'Save' button next to the calendar name to save all your configurations.

That's it!
You have successfully created a new calendar with multiple holidays in it, and can now assign it to one or more of your warehouses.
To do so, simply click the second tab 'Warehouse' in the configurations view, select the warehouse and scroll to the bottom of the page. For a more detailed guide you can also refer to "Configure a new Warehouse".
If you have any further questions, feel free to reach us at [email protected].