Manage User Permissions by Creating User Roles

Anke
Last Update hace un año
What is this article about?
- Learn how to manage feature visibility and permissions for users within your account, and how to restrict user access to specific data sets or types of information
Who is this article for?
- Account admins and users who have the 'User Management' permission and thus can create new users and manage access
Introduction
Before diving into a step-by-step guide, here are some useful facts about user and access management at Logward:
- A user is always assigned a Role
- A user can have only one Role, but an unlimited number of users can share the same Role
- A user's access permissions and rights are solely managed via their Role
- As an account admin, you create Roles and assign them to users, and you can allow other Roles to do the same (however, they will only be able to assign access permissions and rights, that they own themselves)
Step-by-Step Guide
Now, let's get started by logging into your production account at https://app.logward.com/.
Then open your User Settings by clicking the user icon on the right-hand side of the upper menu bar:
Now select 'Users & Roles' from the drop-down menu:

You can now move to the section 'User Roles'.
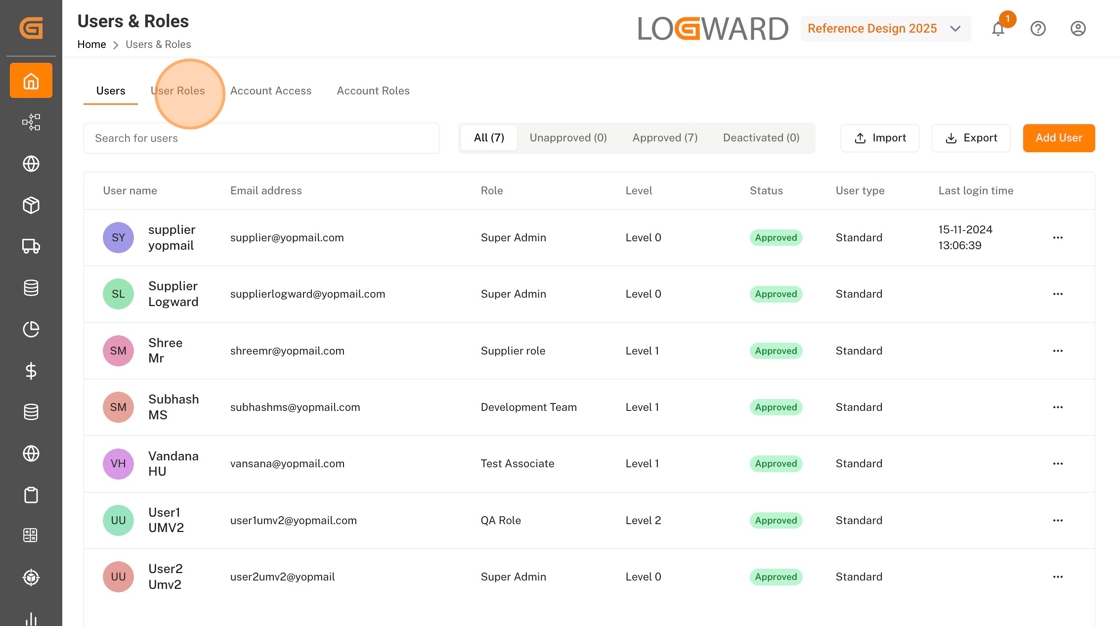
All existing Roles will now be visible for you in a table view. Click the three dots on the right-hand side of an existing role to edit, duplicate or delete it.
To create a new Role, click the button 'Add Role' on the top right of the list view:

Start your work by adding a Name and a Description to the Role you're creating. Then you can select users for the role from the 'Users' dropdown list via a checkbox interface.
And last but not least, if you have created different Sidebar configurations for your user groups, you can choose the 'Sidebar Configuration' that should be displayed for this new Role.
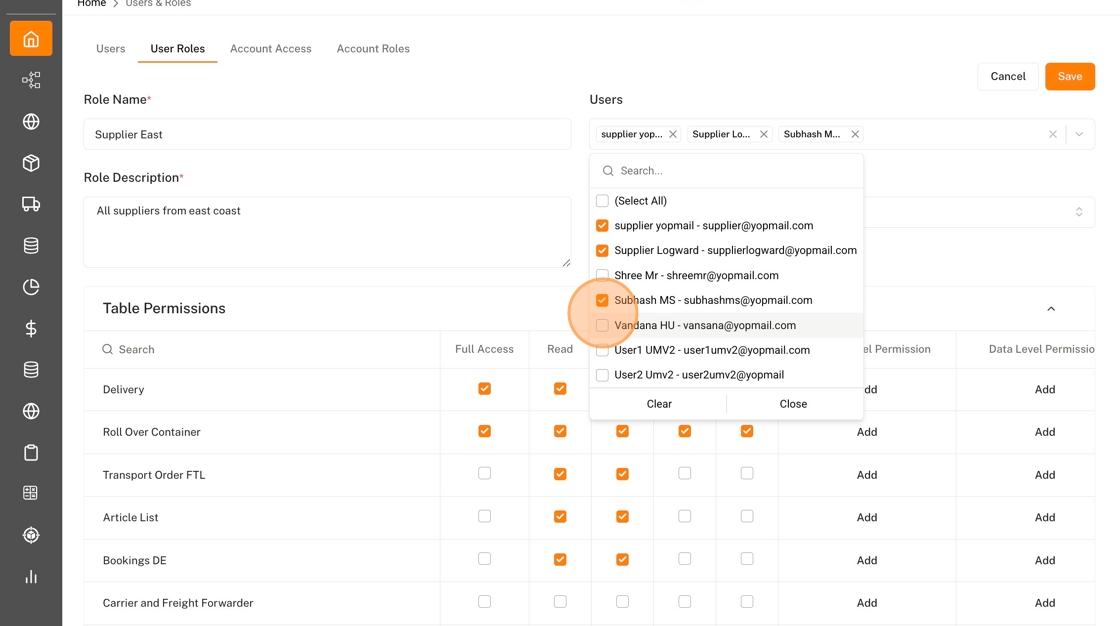
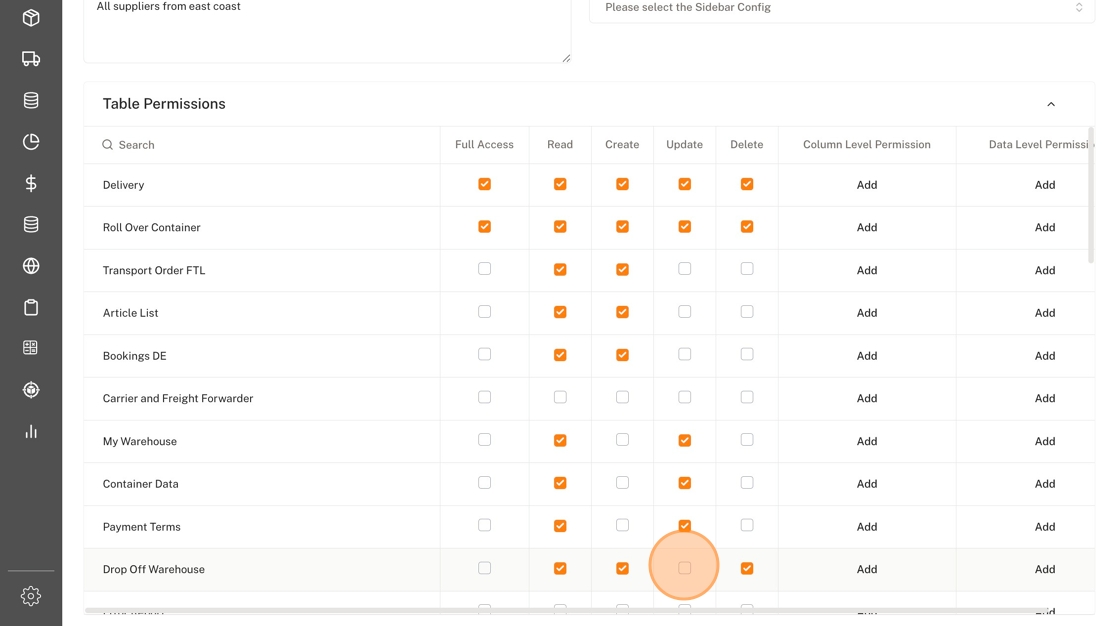
You can then proceed with assigning actual permissions, which are clustered into three different buckets:
- This is the list of all tables that you have created within your Logward account.
- By setting checkmarks, you manage the tables that will be visible for this user role.You may limit access to viewing rights, or include editing or even deleting rights.
- For each table, you can furthermore limit the columns that will be visible and editable, as well as the rows that visible and editable.
- For example, for a Transport Order table to be shared to a Tracking Manager, account admin wants to hide columns that detail cost information and show only those rows that focus on items by region or assigned freight forwarder.
2. Report Permissions:
- This is the list of all dashboards that you have access to within your Logward account.
- By setting checkmarks, you manage the dashboards that will be accessible for this user role, and whether the underlying datapoints can be downloaded.

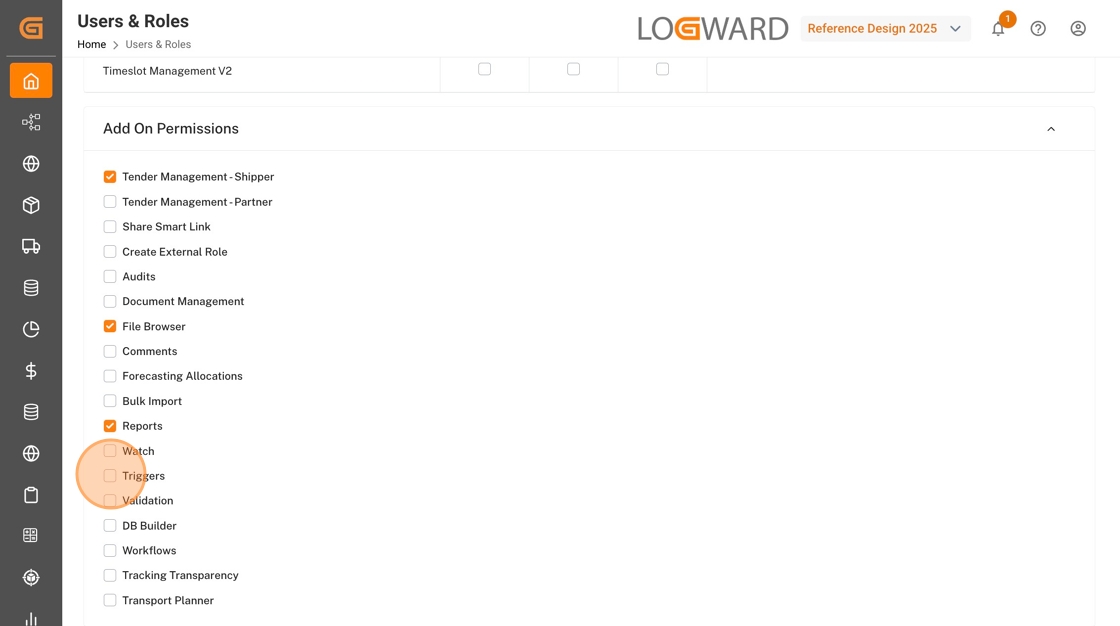
3. AddOn Permissions:
- This section lists all functions of the Logward Platform, such as setting up automations and creating external links, as well as additional features, such as Time Slot Management or the Transport Planner.
- Again by setting checkmarks, you manage the functions and features that will be available for this user role.
Well done!
Don't forget to scroll up again to save your Role configuration. You can also use the "Preview" button on the top of the page, to navigate your account on the base of the Role you have just created.
This guide is part of a series. For more insights, such as User Creation or resending the User Invite, have a look into the related articles below.
If you have additional questions, please do not hesitate to reach out to us at: [email protected]