Importing Bulk Data into a Table

Prerna
Last Update há 2 anos
What is this article about?
- Learn how to create new objects in bulk on a table, using the Bulk Importer
Who is this article for?
- Account admins and users with the AddOn Permission to use the Bulk Importer
Introduction
The Bulk Importer allows users to upload large datasets such as shipment details, inventory information, or tracking records from a spreadsheet file into the existing tables on the Platform. This functionality is especially useful when dealing with substantial data volumes, as it automates the import process and reduces manual entry errors, ensuring data consistency while saving time.
Key characteristics of the Bulk Importer:
- The Bulk Importer works at the table level and imports data from only one sheet of your spreadsheet at a time.
- It does not support importing data into multiple tables simultaneously, even if those tables are linked via the LookUp functionality.
- The primary function of the Bulk Importer is to create new objects in a table. For this, the 'code' field should be left empty in your spreadsheet and set as the 'unique identifier' during column mapping.
- The Bulk Importer also supports updating existing objects. To ensure the correct objects are updated, the 'code' field must contain the unique Logward identifier for each object and be selected as the 'unique identifier' during mapping.
Step-by-Step Guide
1. Navigate to a Table's Bulk Importer
Open the table for which you want to import bulk data, and select 'Import' from the toolbar within the menu 'Home':

This will open the Bulk Importer, where you will always see the following options for each of your tables:
Download Filled Spreadsheet
- Allows you to download an XLSX file that contains all the columns with the correct column names from your table, along with the objects currently in the table. This can be used as a template or to update existing objects.
- Allows you to download an empty XLSX file that correctly reflects all columns and column names from your table. This can serve as a template for adding new objects.
- If you already have a spreadsheet template that you use regularly, you can skip downloading a sample file by clicking the orange 'Next' button at the top right.
In this guide, we will skip downloading a template file and instead walk you through the process of mapping your spreadsheet content to the table columns.

2. Upload your Spreadsheet
You can now select the spreadsheet containing your bulk data for upload. Supported file formats include XLSX, XLS, and CSV:
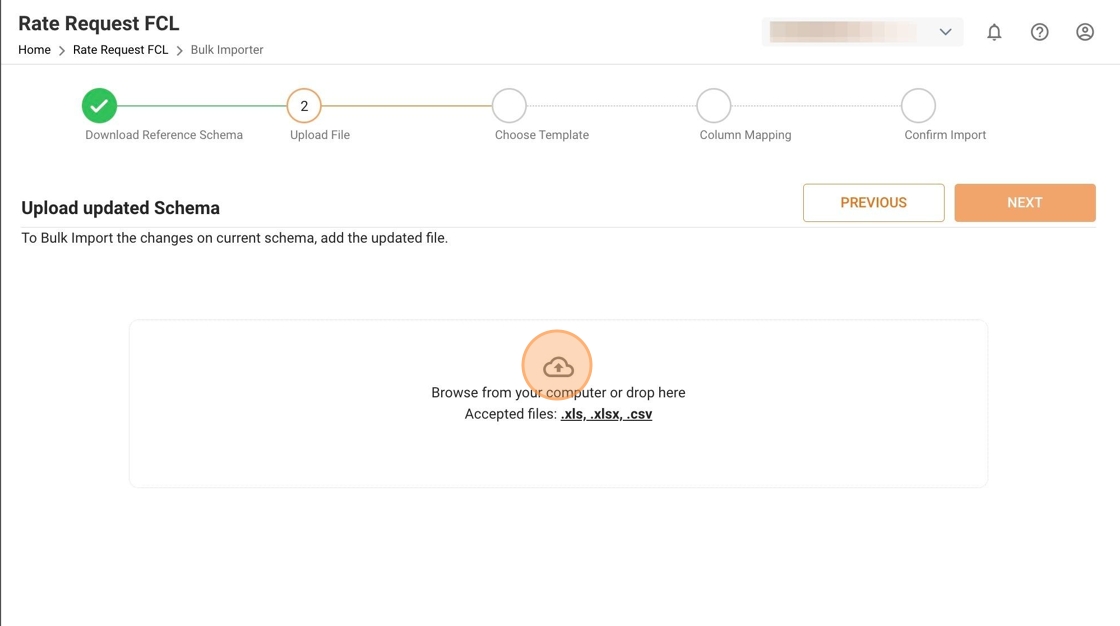
Below the upload window, you'll need to specify the name of the worksheet that contains your data.
If your spreadsheet has only one worksheet, it will default to the sheet name 'my sheet.' If your spreadsheet contains multiple worksheets, their names will be listed, and you can select the correct one.
Once done, you can click the 'Next' button on the top right:

3. Choose or Create a Mapping Template
After moving on from the previous step, you'll see a list of existing import mapping templates, if any have been created for the selected table. Choosing a saved template can speed up the process, but for this guide, we'll walk you through creating a new template from scratch. To get started, click the 'Create New Template' button at the top:

This opens the Column Mapping interface.
Begin by giving your template a name:

4. Map Spreadsheet Content to Table Columns
The mapping interface will display the column names from your spreadsheet on the left, and the columns from the target table in a dropdown list right next to it.
The mapping interface displays the column names from your spreadsheet on the left, with a dropdown field on the right, which hold the columns from the target table:

The system will attempt to automatically match your spreadsheet columns to the appropriate fields in the target table. However, you can manually adjust these selections by choosing a different column from the dropdown, and you’ll need to map any fields that were not automatically matched.
Note: Each table column can only be mapped to one spreadsheet column. Once you map a spreadsheet column to a field in the target table, that field will no longer appear in the dropdown for other columns. To remove a mapping, click the small black cross next to the column name.
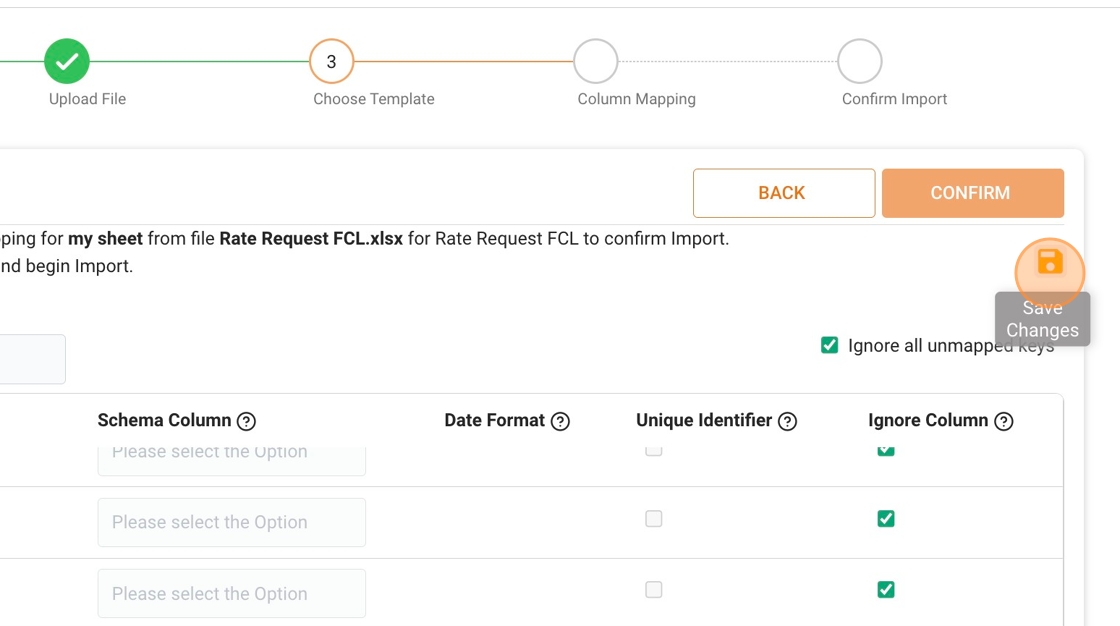
5. Ignore Unnecessary Columns
Your spreadsheet may contain columns that are either not relevant to the selected table or contain data that you don’t want to update. In both cases, you can choose to ignore these columns and import data only for the necessary ones:

Each column in your sheet must either be mapped to a table column using the dropdown or marked as ignored. Otherwise, the system will not allow you to proceed. To help with this, the system provides a bulk option - 'Ignore All Unmapped Columns' - which you can use to quickly ignore any unmapped columns:

Once you've mapped the necessary columns and marked the irrelevant ones to be ignored, click the 'Confirm' button at the top right to proceed.
6. Select the Unique Identifiers
When importing bulk data into a table, you can either update existing objects or create new ones.
To avoid duplicates when creating new entries, the Bulk Importer allows you to specify which fields should define the uniqueness of each data entry.
By selecting the 'Unique Identifier' checkbox next to the relevant column headers, you designate these unique identifiers.
You can also combine multiple fields for this purpose. For example, the combination of 'Equipment Type,' 'POL Locode,' and 'POD Locode' could form a unique identifier for a shipping rate:

Once you are satisfied with your selection, proceed by clicking on the 'Confirm button' on the top right side.
Note: 'Unique Identifier' is an optional functionality. You may proceed without making a selection. In that case, all rows from your spreadsheet will be imported and created, without checking for potential duplicates or updating existing objects.

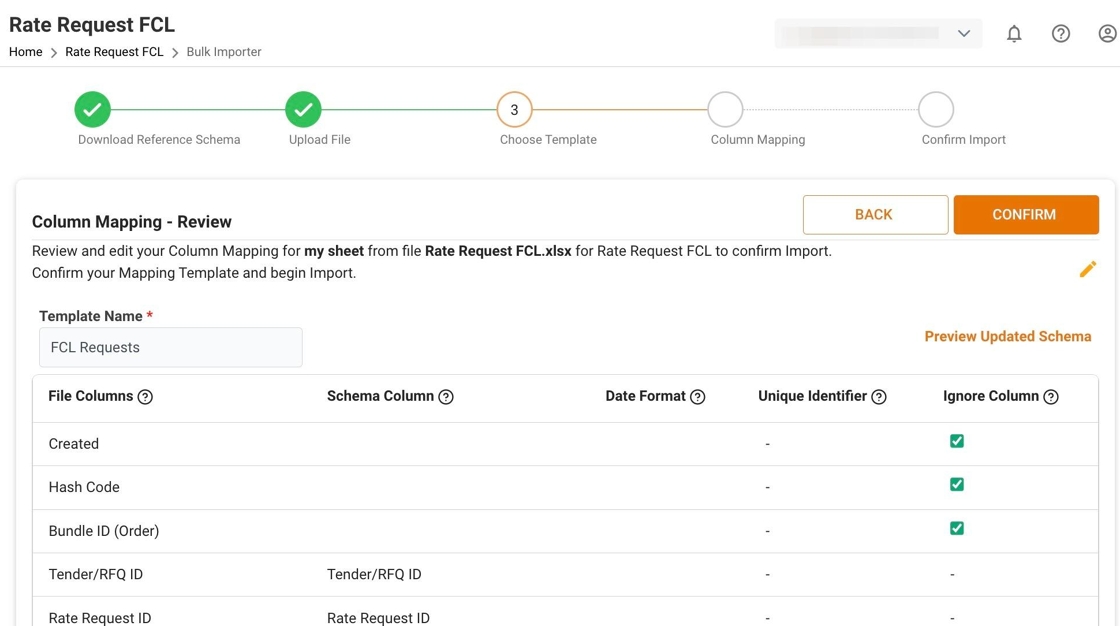
7. Review and Import
Before starting the upload process, you'll be prompted to review all your mappings. If you spot anything that doesn’t meet your requirements, click the 'Pencil' icon at the top right to edit the mapping.
Once you're satisfied with the changes, click the 'Disc' icon to save your updates:
You can also use the 'Preview Updated Table' function, which opens a popup displaying the table with the updated objects:

8. Save your Mapping as a Template
Once you finished the review, click the 'Confirm' button on the top right side.
This will open a popup with the following options:
- You mapping will will not be saved for future use.
- This option can only be selected, when you used an existing template, and allows you to save any changes you've made to it.
- Your mapping will be saved as a new template for the chosen table for future use.

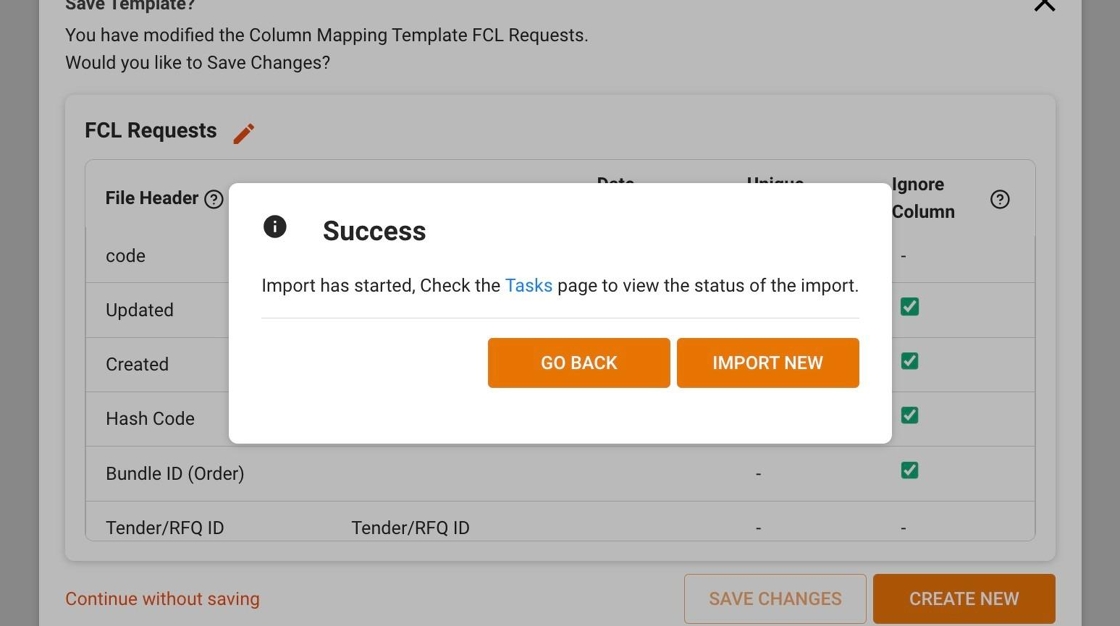
As soon as you made a selection, the import process will start
A success message will pop up that allows you to:
- track the progress of the import process on your 'Tasks' page,
- go back to the mapping template configuration,
- or upload another spreadsheet file.
9. Check the Import Status
If you follow the link to your 'Tasks' page, you find a log with all bulk data imports for your account, with the most recent upload on top of the list. You can also access this view by clicking your profile icon on the top right side and selecting the menu 'Tasks':
