Global Document Management

Livia
Last Update 6 dagen geleden
What is Global Document Management?
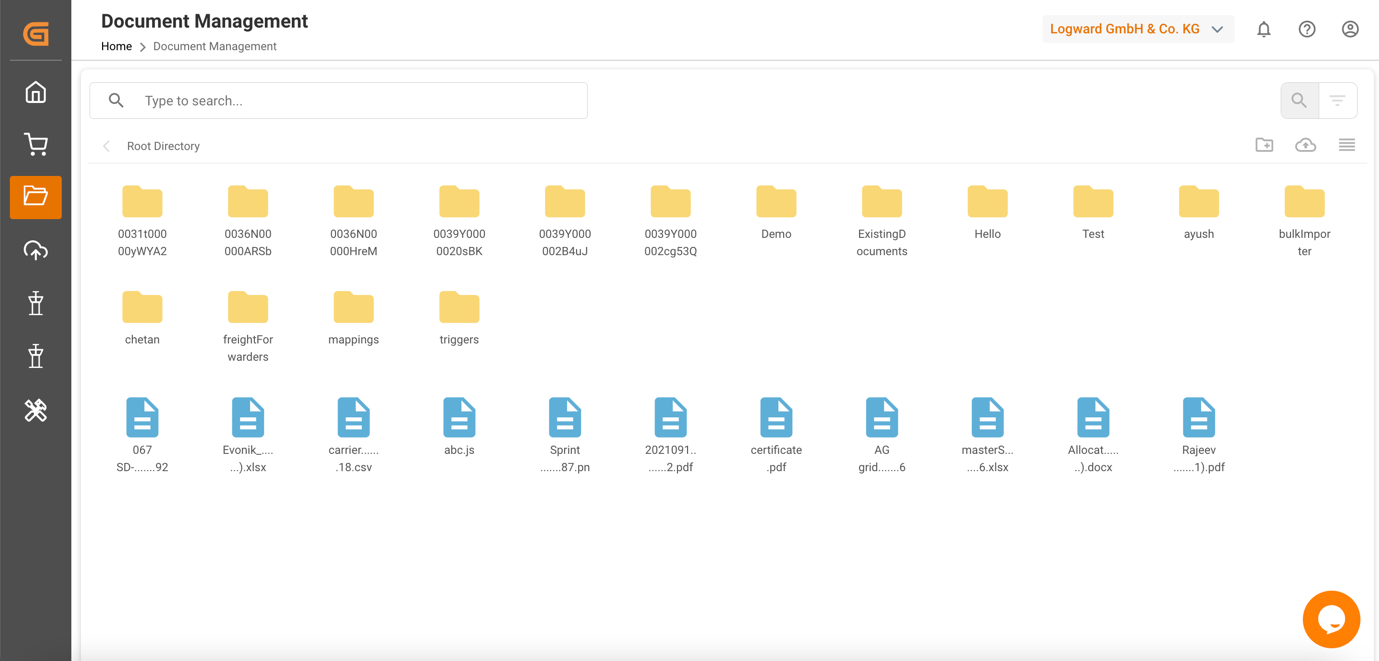
Global Document Management is a central repository where users can store and manage all their documents.
How to access Global Document Management?
- Open a folder : Users can open a folder by double-clicking on it.
- Select a file/folder : Users can select a file/folder with a single click.
- Navigate through the folders : Double-click on the folder to open it. The current path will show up just below the search bar. Click on the back arrow (next to current path) to go back.
- Create a folder : Go to the path where you want to create the folder. Click on the “Create folder” icon on the top right of the screen. A pop-up appears, enter the name of the folder, and click on “Create”.
- Delete a folder (if you have the delete permission) : Select the folder. The "delete" icon will appear next to the "Create folder" icon. Click on it and click on “Confirm” to delete.
Note: Users can delete a folder only if it’s empty.
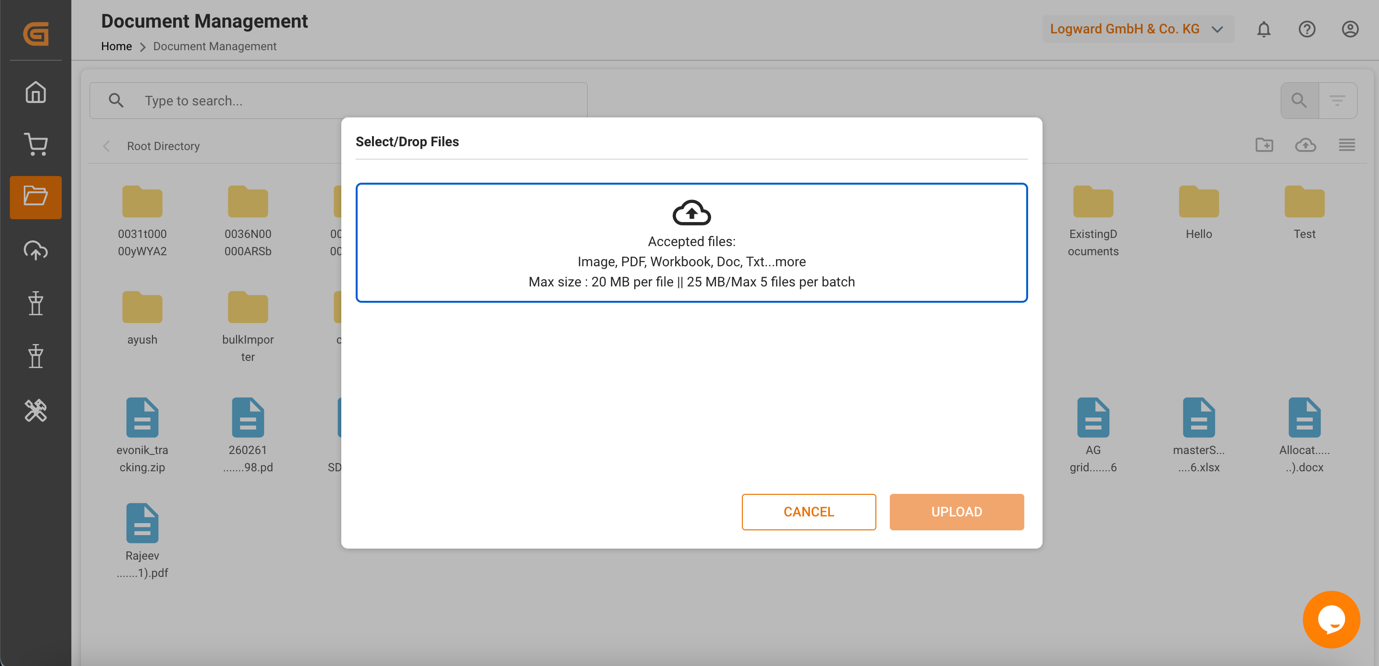
Supported file formats - rar, zip, tar.gz, csv, dat, log, sql, xml, email, eml, msg, vcf, jpeg, jpg, png, svg, css, html, ppt, pptx, pps, xls, xlsx, xlsm, doc, docx, odt, pdf, rtf, txt. File and folder name can be maximum 50 characters. File and folder names should not contain any special characters except “&”, “-”, “|” and “:”.
3. File options : After users select any file, some more icons become visible on the left of the “Create folder” icon.
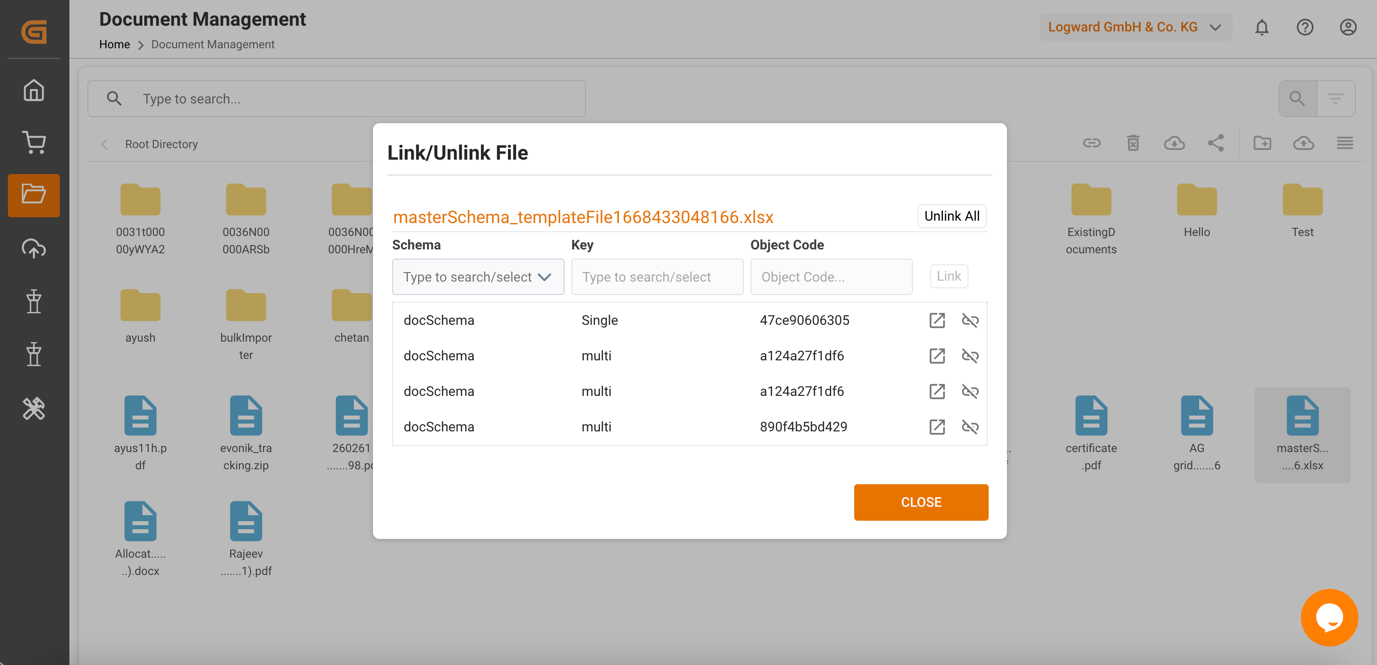
- Link and unlink file to object : Select the file and click on the “Link” icon. A pop-up will open and show to which all objects, in Data Management, the file is linked to, with schema name, key name, object code, button to open that object (opens in new tab) and option to unlink this file from a particular object. If users click on unlink button, that file will be removed from that key in that object (in Data Management). If users want to link the file to a particular object, they should select the schema from the dropdown. This will show all the keys of document type in a dropdown. Users can select the key to which they want to attach the file, then fill the code of the object and click on “Link” button. Users can view this file in that object, in Data Management, for that particular key.
- Preview a file : Double click on the file to preview the file. Currently only image, PDF, Word, Excel and text types are supported for preview. (Files uploaded before November 15, 2022 are not available for preview).
- Delete a file : Select the file. Click on the “Delete” icon. A confirmation pop-up will open. Click on “Confirm”. Users can only delete the file if it’s not linked to any object in Data Management. So, first remove all the links to the objects from a file and then delete the file.
- Download a file : Select the file. Click on the “Download” icon. The file will be saved to your computer.
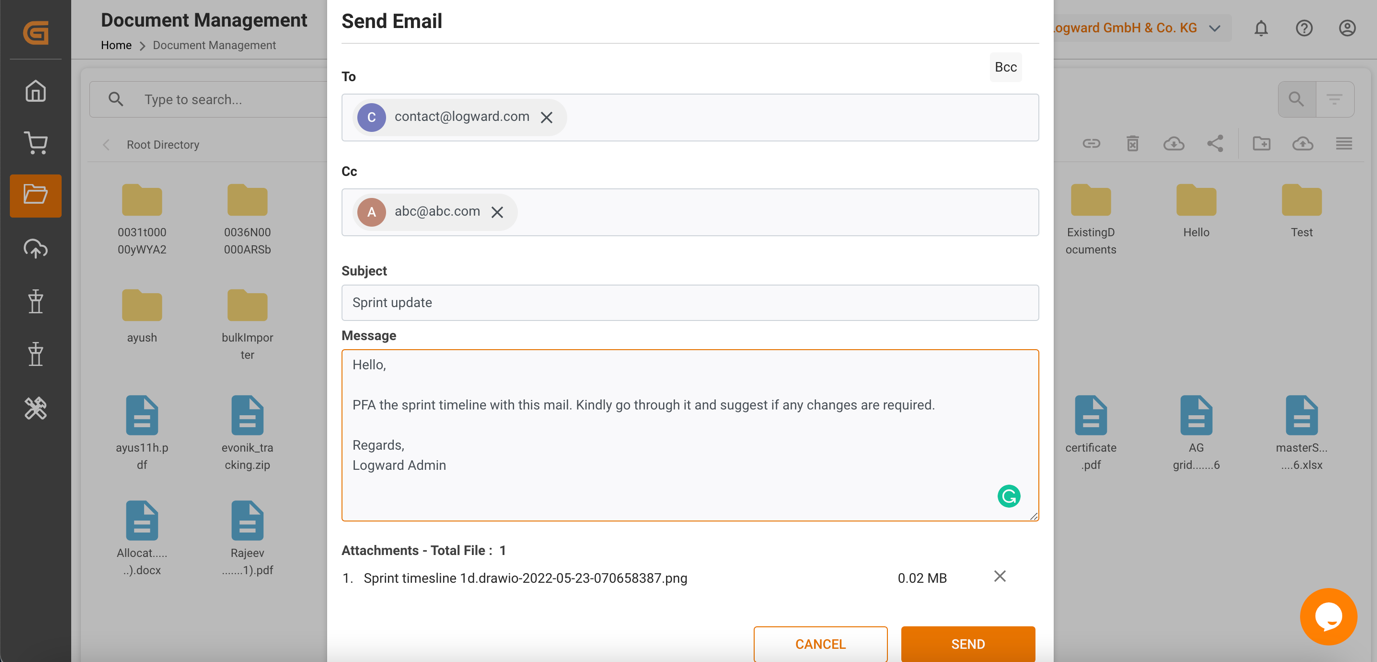
- Share a file : Select the file. Click on the “Share” icon. An email pop-up will open. Fill out the receiver’s email address, subject, and message. Click on the “Send” button to send the email; the file will be attached to that email. If the file is linked to any object, and the users want to send that object information in the email then they need to open that object and send the email using any pre-defined email template.
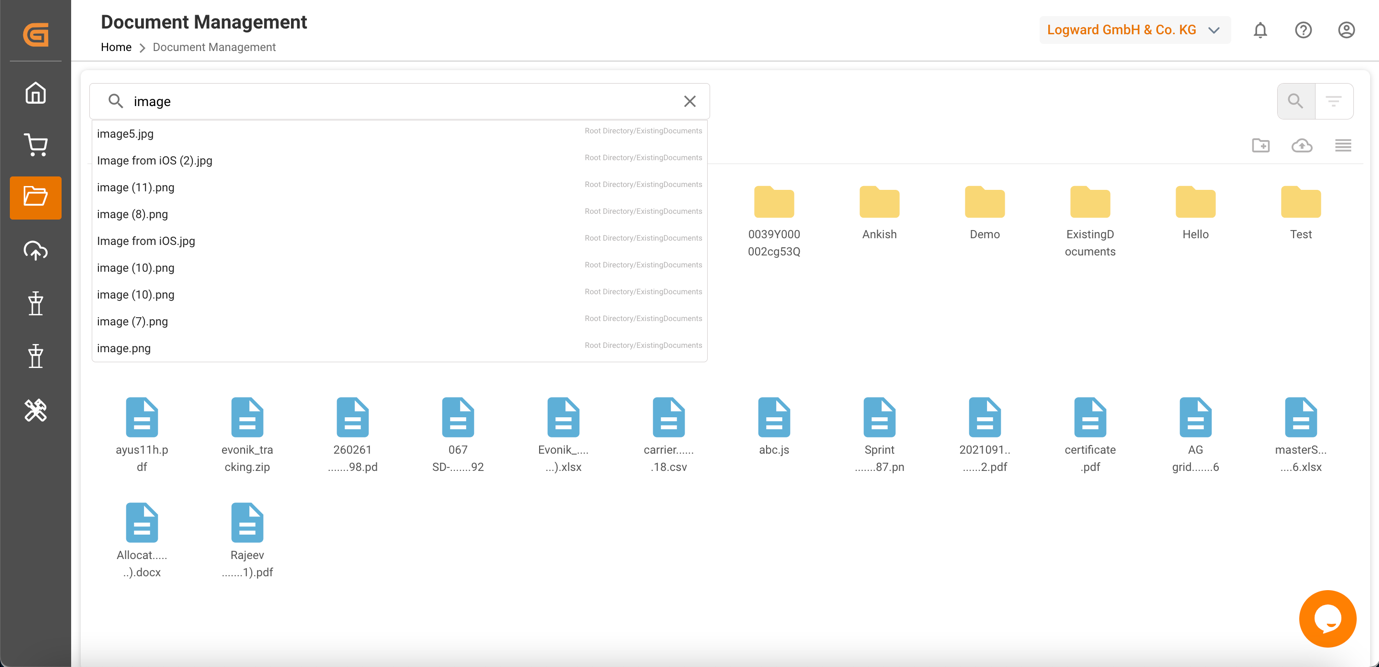
- Search a file : Click on the “Search” icon at the top right of your screen. Enter the name of the file in the search bar. It will show all the files matching your search, across all folders, along with the path of the file in the search result. Users can select the file they want, it will show up in Document Management. If they click on the cross on the search bar, it will take them back to the root folder.
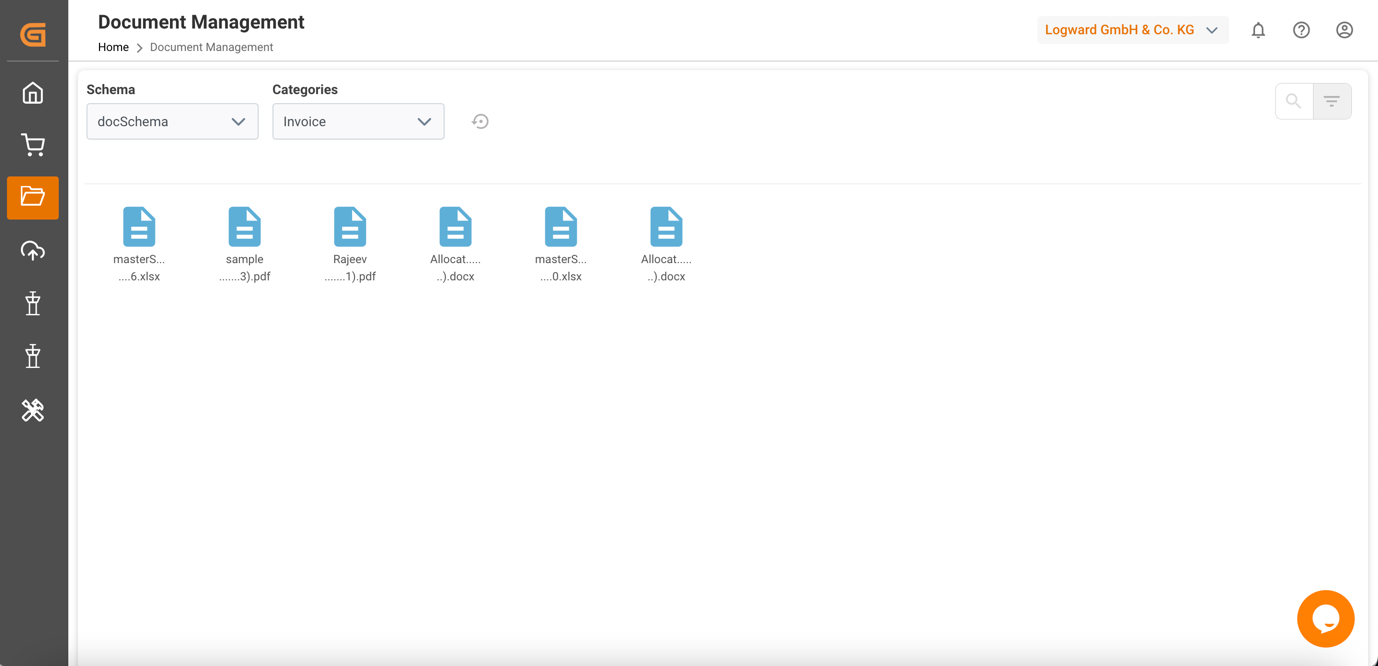
- Filter files using categories : Every document type key in a schema has a category associated with it. Whenever users link a file to any particular key in a schema, that file will be associated to the category of that key. Click on the “Filters” icon on the top right of the screen. First, select the schema name from the dropdown, it will show all the categories of the document in that schema. Then, choose a particular category, it will show all the files which belong to that category in that schema.
Files in Data Management
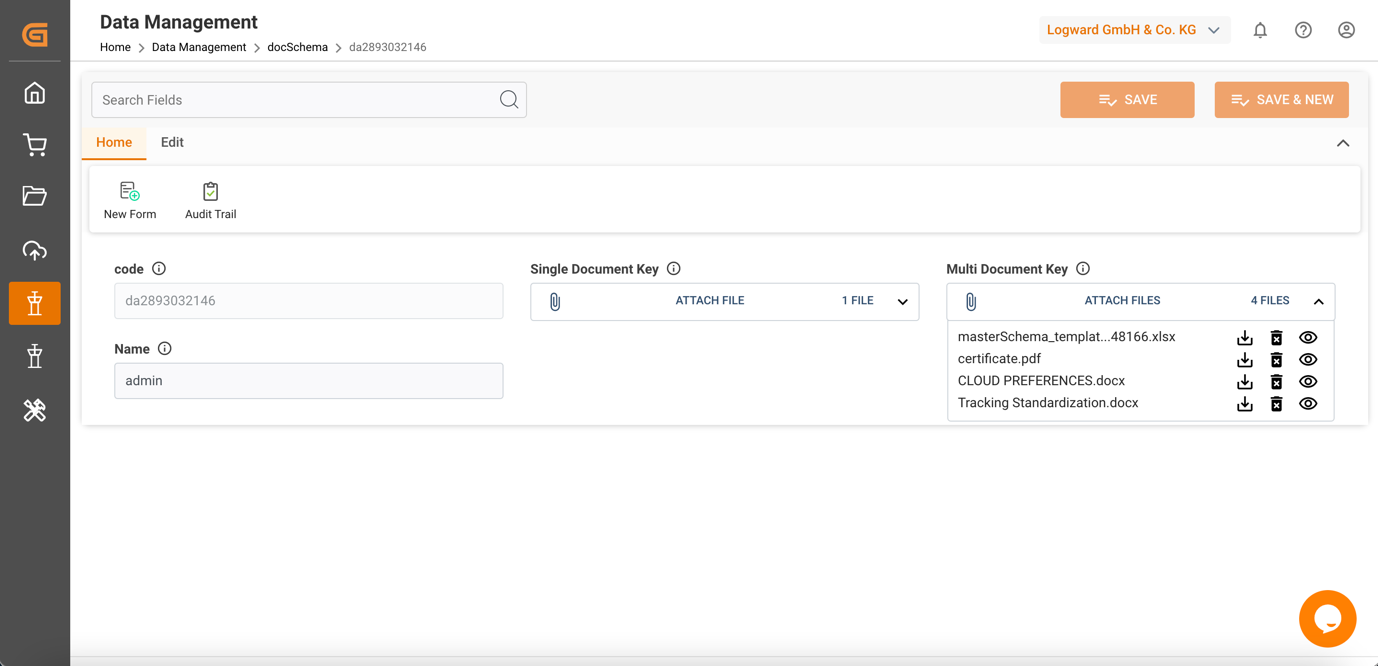
Some keys in Data Management support uploading files to them. These keys can support a single document upload or multiple document upload. Users can also define which document key falls in which category (e.g., Invoice, BOL, Purchase Order, etc.) by defining that in the schema. After the document type keys are configured in the schema, users can upload and use files in the object.
- Accessing files : Click on the expand arrow in any document type key. It will show all the files which are attached to that key. Each file has multiple options:
3. Unlinking a file : Click on the “Delete” icon next to the “Download” icon. This will remove the file from the list. Then click on “Save” at the top right of the screen. The file is available in Global Document Management. Users can delete the file from there.4. Preview a file : Click on the “Preview” icon. The preview pop-up will open. Currently, only image, PDF, Word, Excel, and text types are supported for preview. (Files uploaded before November 15, 2022, aren't available for preview)
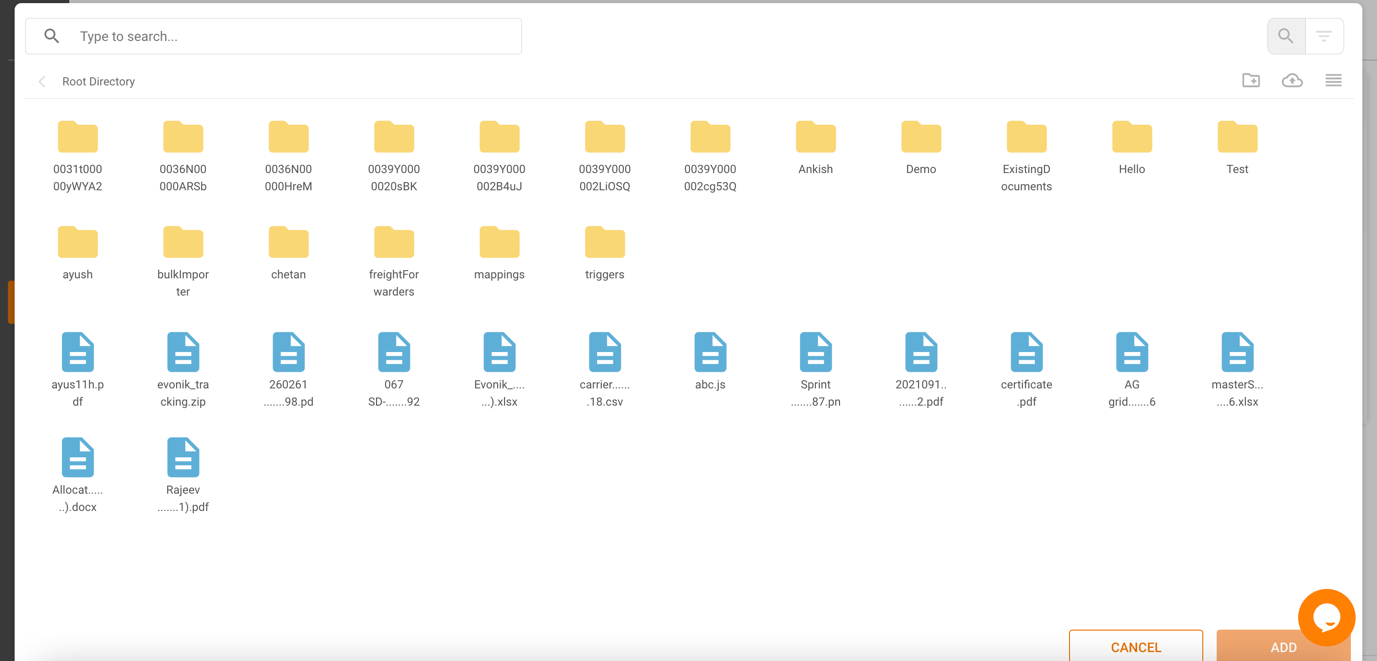
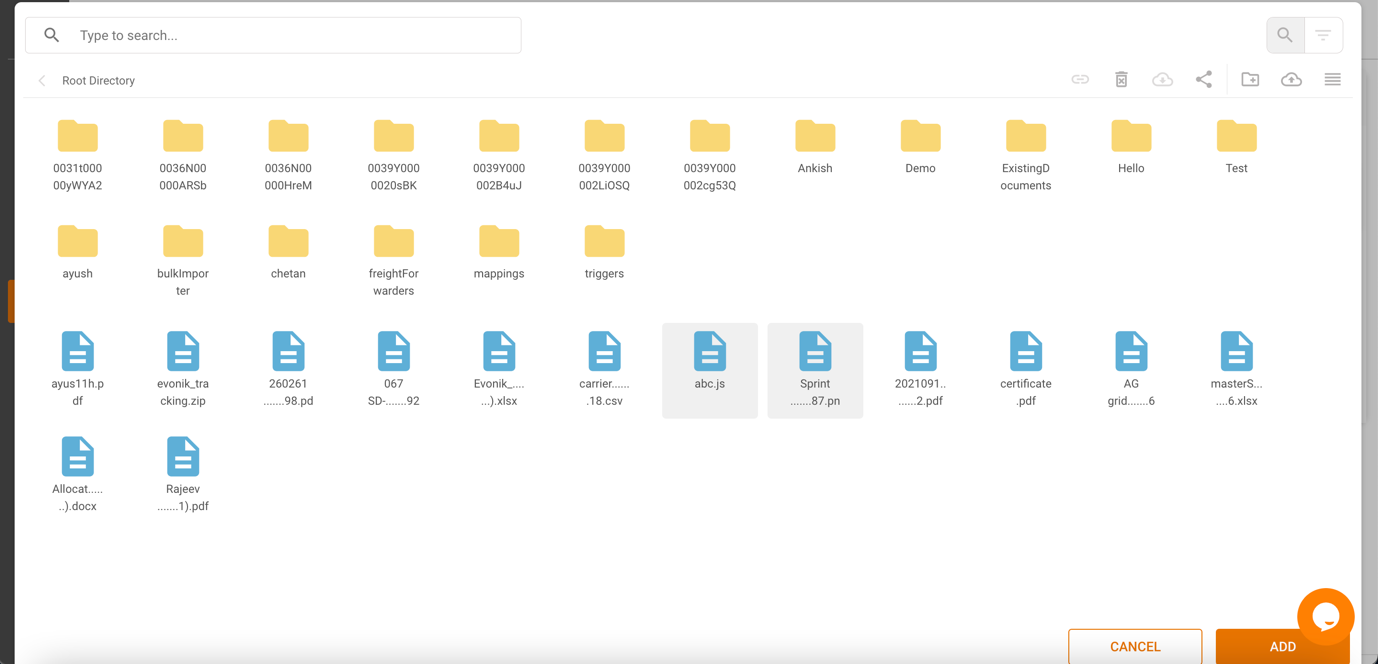
5. Linking a file : Click on the document type key. It will open the Global Document Management pop-up. Users can select any existing file, or they can upload any new file, like we do in Global Document Management. Users can then select the file(s) they want to link. Select multiple files by pressing “Shift” key on your keyboard. After selecting the files, click on “Add” button. These new files are visible in the expanded section of that key. Click on “Save” button at the top right of the screen. This links the file to that key, and also associate it with the category of that key.
If you have any queries or want to know more, reach out to [email protected]