Send an Email from a Table

Prerna
Last Update 2 years ago
What is this article about?
- Learn of the different options you have when you want to send emails out of the Logward Platform
Who is this article for?
- Users whose role have the permission to send emails associated with specified table permissions of the account
Introduction
Before diving into the detailed guide, here are a few things to note:
- Users with corresponding permission sets can send emails from the Logward account.
- In addition to writing emails within in the application as needed, admin users can set up email templates for their users, to standardize and speed up the process.
- Which email templates are visible for a user, depends on the access permissions that the admin user set up during creation of the template.
Finding the email function on the Logward Platform
Emails are sent at form level, and only one data row at a time can be selected. That means, to send an email you have to navigate to a table in your account and open the detail view of a specific object.
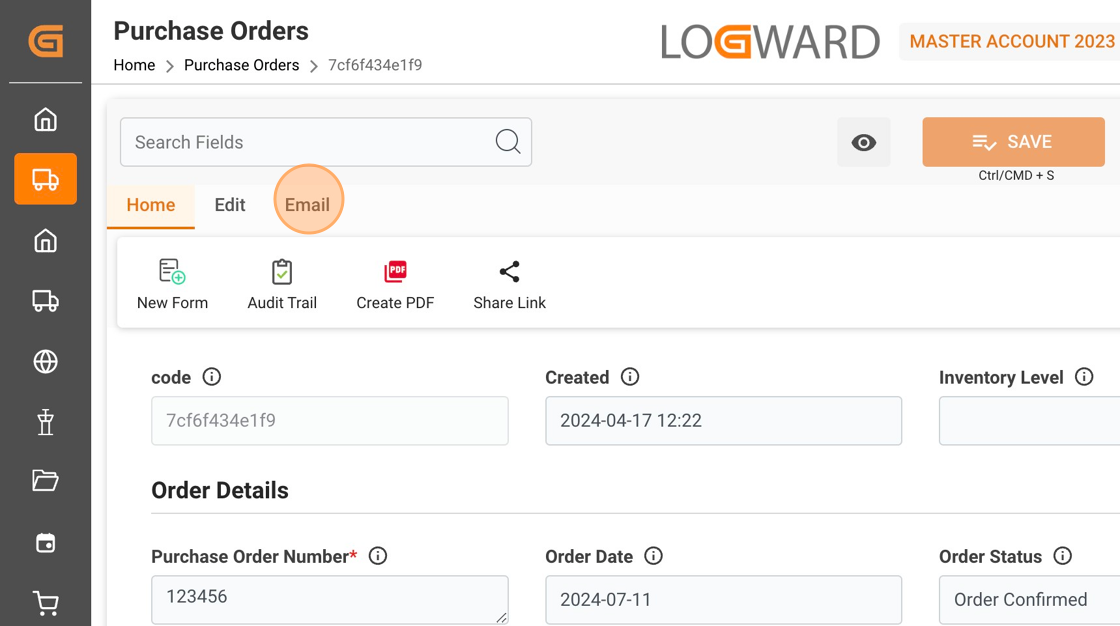
For our guide, we select a row from Purchase Order table and open it's respective detail view (form) using the pencil icon:

Once you've accessed a specific object, click on "Email" within the menu, then select the option "Send Email" from the toolbar.
This opens a pop-up window in which you can draft your email:

You now have two options: either type your email body from scratch, or select an existing email template to use. In the following, we'll explain both ways.
Option 1: Create your own email
After you click on "Send Email", a new window opens, in which you design your email.
Start by adding one or more recipients to your email. You can either type in email addresses manually, or derive the email address from a data field that is linked to your object (in our example, a purchase order).
To select such a data field, click on the "+" sign on the right side of the "To" input box:
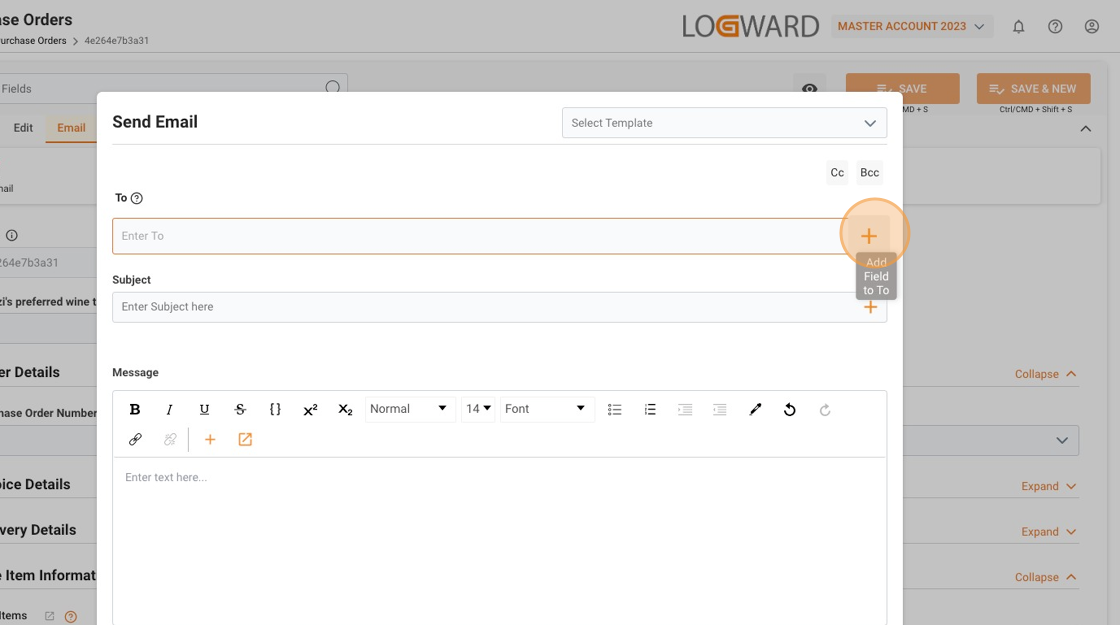
This opens a list with all data fields connected to the object. After selecting one, click the "Apply" button and it will be added to the "To" input box.
For our guide, we use "Bill To", which is a lookup that leads us to data fields from another table, where we select "Email ID":


In a similar fashion, you can now type the subject line, and add data fields from the Purchase Order via the "+" sign, as needed.
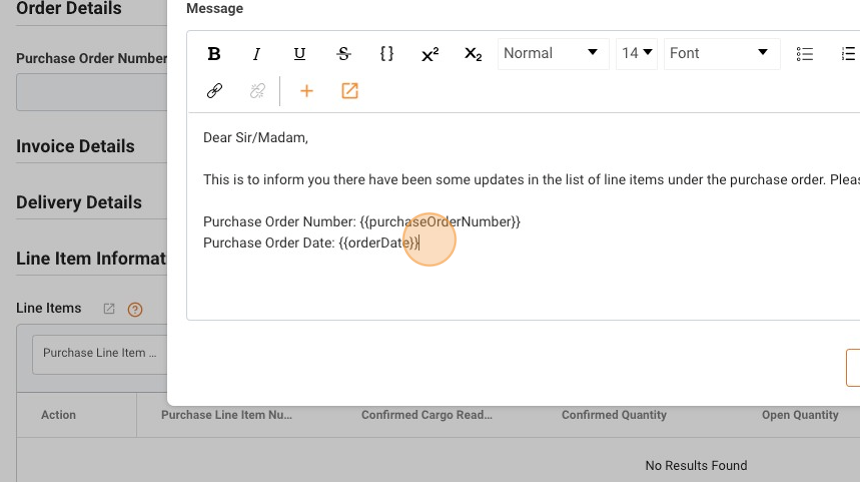
The actual email body can then be typed and styled, as in any email application, using the formatting tools in the toolbar.
If you would like to add content from certain data fields to the email body, you will find the corresponding "+" sign in the same toolbar. Of course, you can multi-select fields, then click on the "Apply" button.

Note: If you add data fields to the email body, that are derived via lookup from another table, the content of these data fields will be displayed in a horizontal table format, as you can see in the following screenshot:

Once you're happy with your email, click the "Send" button at the bottom right of the popup window. Of course, upon sending, the placeholder fields that you added will be filled with the actual content.
Option 2: Use a predefined template for your email
The popup window that opens when you click on "Send Email" within an object holds the drop down menu "Select Template" on the top right. This list will reflect all email templates available for the chosen table and for your user role:

For our guide, we select the template "New CRD". which will populate all content that was prepared by the account admins:
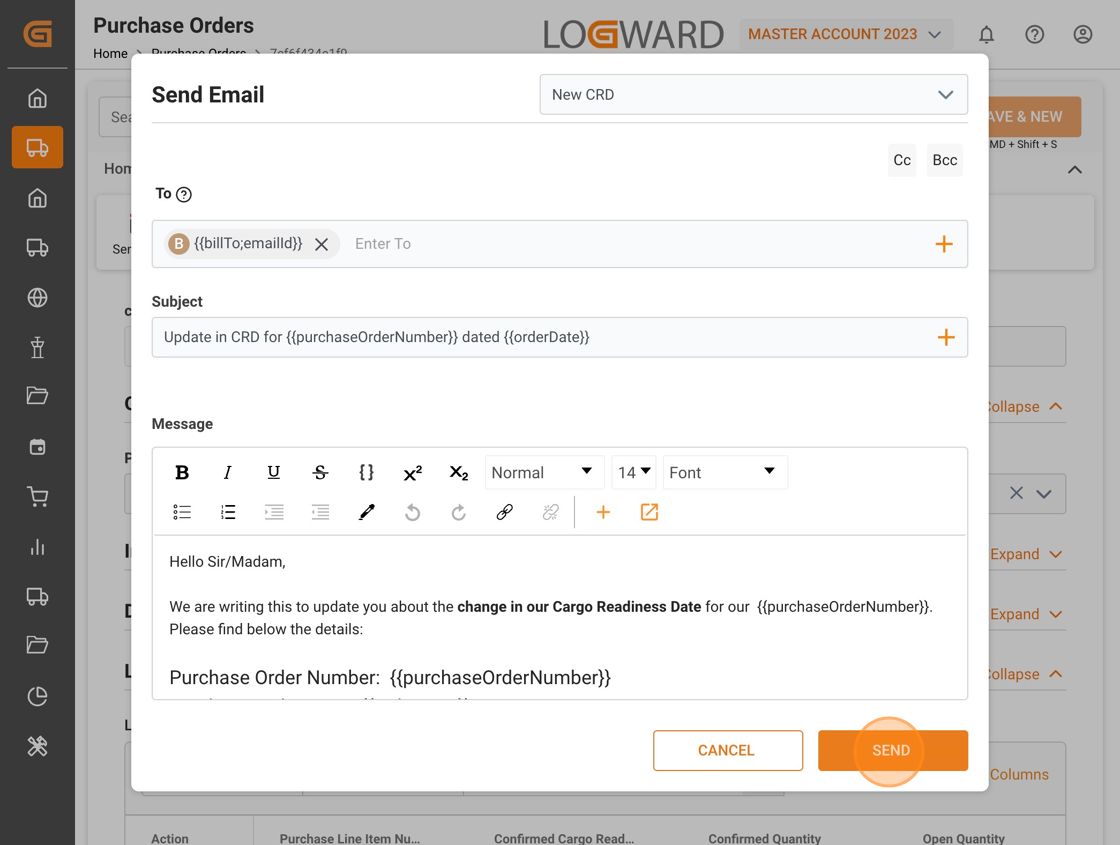
If needed, you can change and rework the email now. Any changes will be applied to this email only and not affect the template.
Again, data fields added via the "+" sign will appear as placeholders. The actual values will be derived and inserted after you dispatch your email.
Click 'SEND' when ready. The email window will close, and you'll see a success or failure message on your screen.
Well done! Now you are equipped to send emails from any table to any person.
For more information on email templates, check out our guide on how to configure email templates!
If you have additional questions, please do not hesitate to reach out to us at: [email protected]